
Nutanix Move is the free appliance Nutanix ships for migrating virtual machines onto AHV with minimal downtime — handling disk seeding, guest OS preparation and the final cutover in one workflow instead of a manual export/import process. In a recent engagement we used Move to migrate a batch of production VMs from a VMware ESXi/vCenter environment onto a Nutanix AOS cluster. This post walks through how the appliance was deployed and configured, how a migration plan comes together end to end, and two real errors we hit along the way — with screenshots from the actual project (customer identifiers, IP addresses and VM names have been redacted throughout).
Deploying the Move appliance
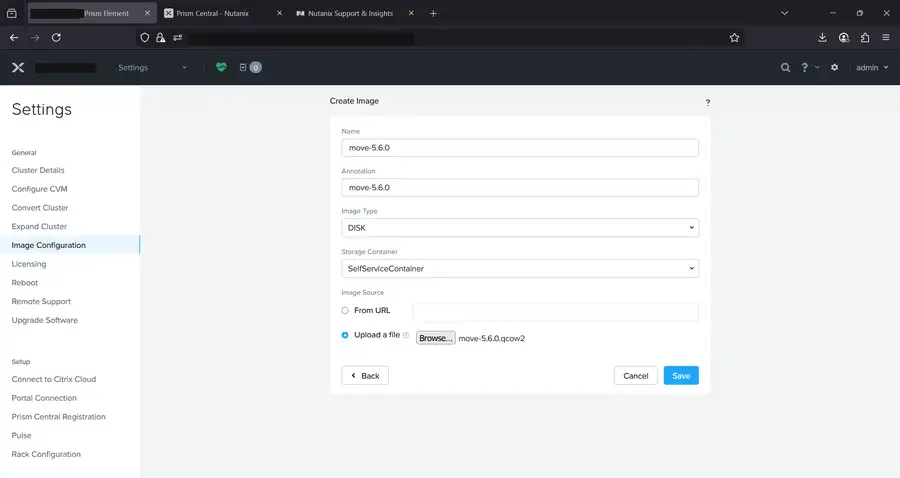
Move ships as a virtual appliance and can be deployed either as an OVA directly in vCenter, or — as we did here — as a disk image imported straight into a Nutanix AHV cluster via Prism Element. In Settings > Image Configuration we created a new DISK image, uploaded the move-x.x.x.qcow2 file Nutanix publishes for each release, and pointed it at a storage container. Once the image finishes uploading, a VM is created from it and powered on to get the appliance running.
First login and initial setup
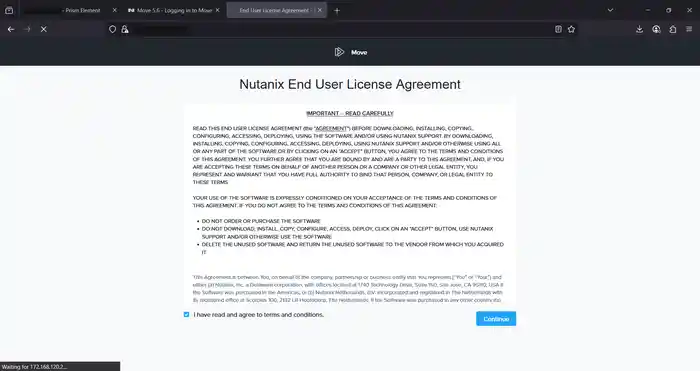
The first time you open the Move web console you’re presented with the Nutanix End User License Agreement, which needs to be accepted before anything else is available.
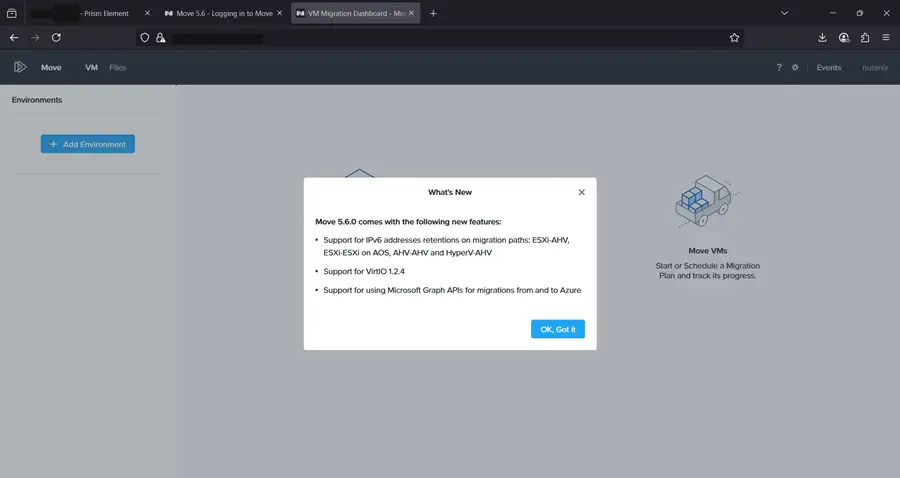
Past the EULA you land on the VM Migration Dashboard. On a fresh 5.6.x deployment Move also surfaces a “What’s New” banner summarising the release — in our case IPv6 retention on several migration paths, VirtIO 1.2.4 support, and Microsoft Graph API support for Azure migrations.
Migrating settings from an older Move instance
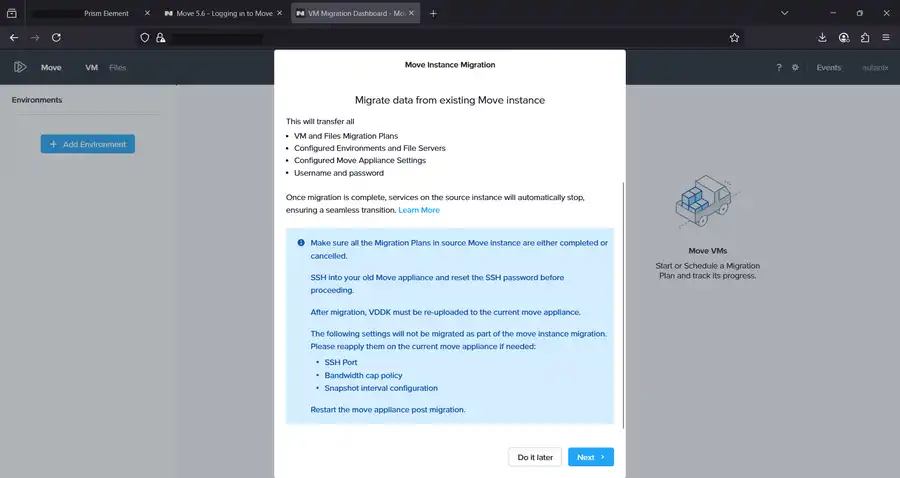
If you’re replacing an older Move appliance rather than starting from scratch, Move offers a one-click “Move Instance Migration” that pulls across all migration plans, configured environments, appliance settings and credentials from the previous instance, then automatically stops services on the old one once the transfer completes. A few things are called out as not carried over — the SSH port, bandwidth cap policy and snapshot interval configuration have to be reapplied manually, and VDDK needs to be re-uploaded to the new appliance.
Adding source and target environments
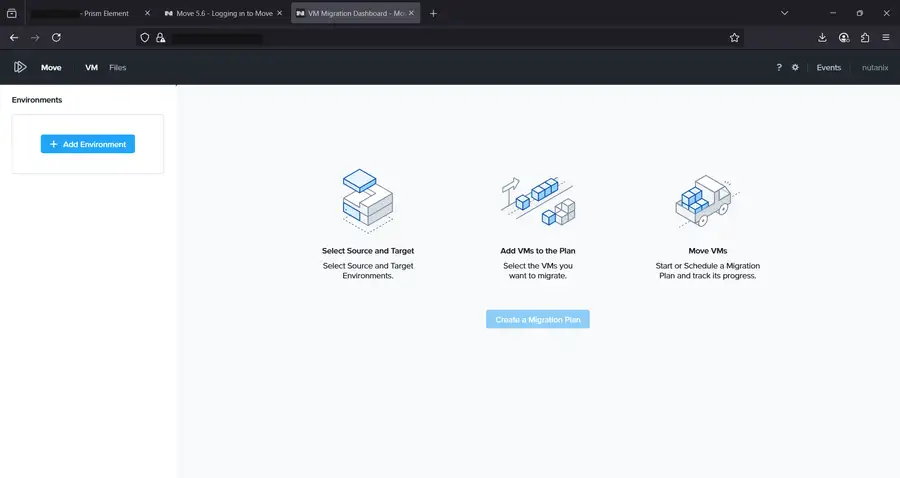
With the appliance up, the dashboard shows the three steps every migration follows: select source and target, add VMs to a plan, then run the migration.
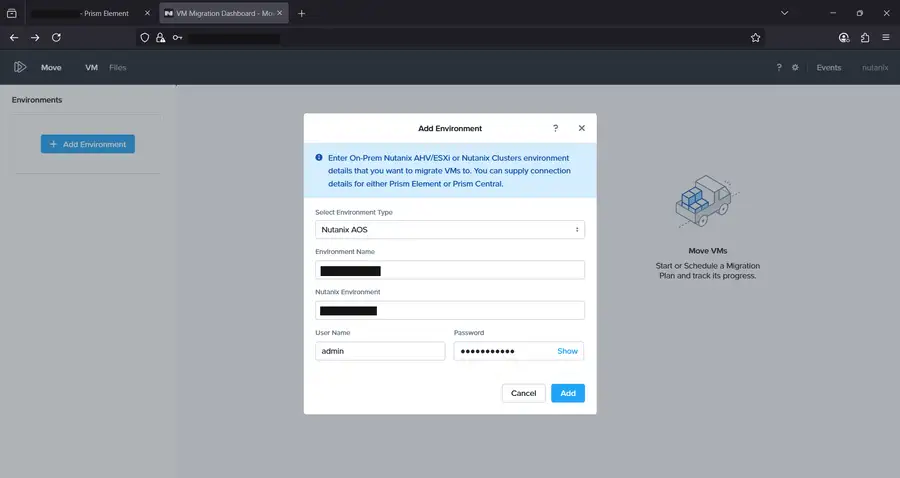
The target is added first — a Nutanix AOS environment, which can point at either Prism Element or Prism Central, along with the admin credentials for that cluster.
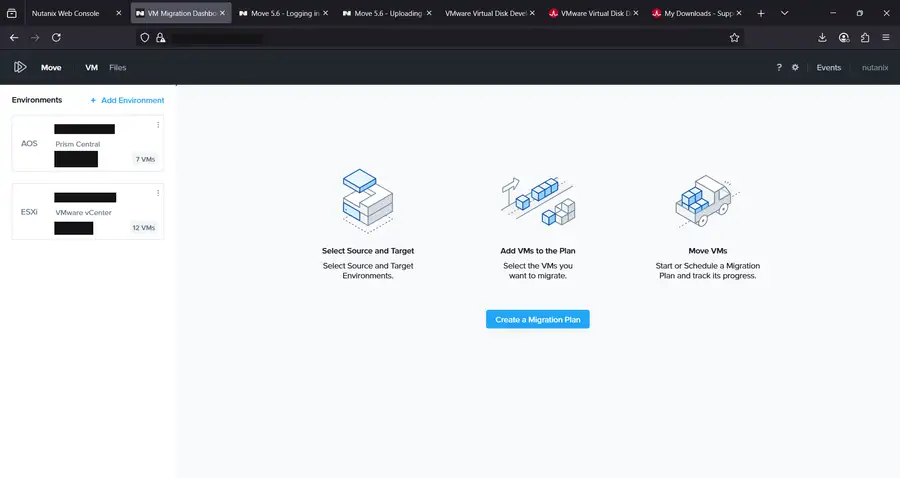
The source — our VMware vCenter — is added the same way. Once both are registered they show up side by side in the Environments panel, each listing how many VMs it can see.
Uploading VDDK for ESXi sources
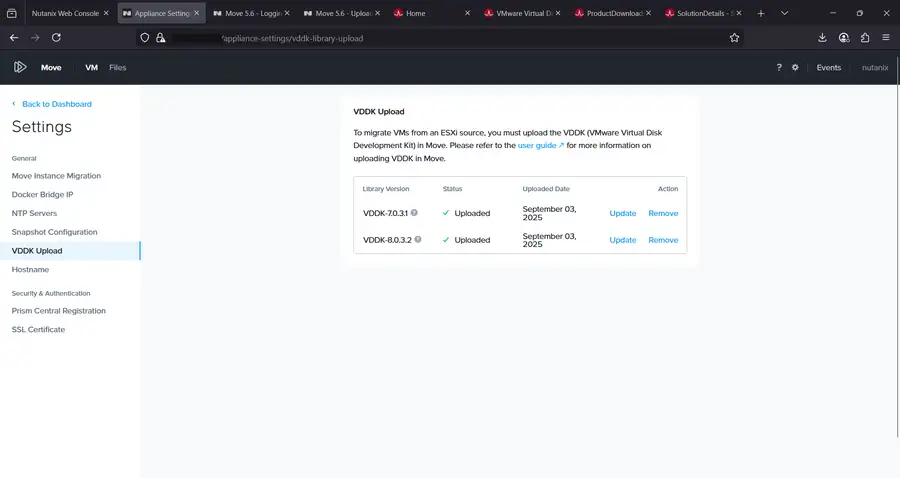
Migrating from ESXi requires VMware’s Virtual Disk Development Kit (VDDK) to be uploaded into Move — it’s what the appliance uses to read VMDKs during disk seeding. This is a one-time step under Settings > VDDK Upload; we kept both 7.0.3.1 and 8.0.3.2 uploaded to cover VMs across different ESXi/hardware version combinations in the estate.
Building a migration plan
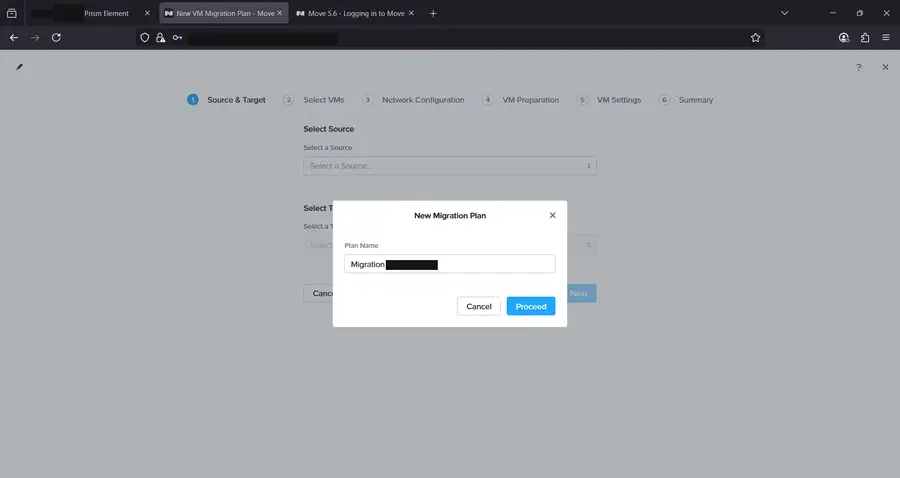
Everything from here happens inside a migration plan wizard. It starts with naming the plan.
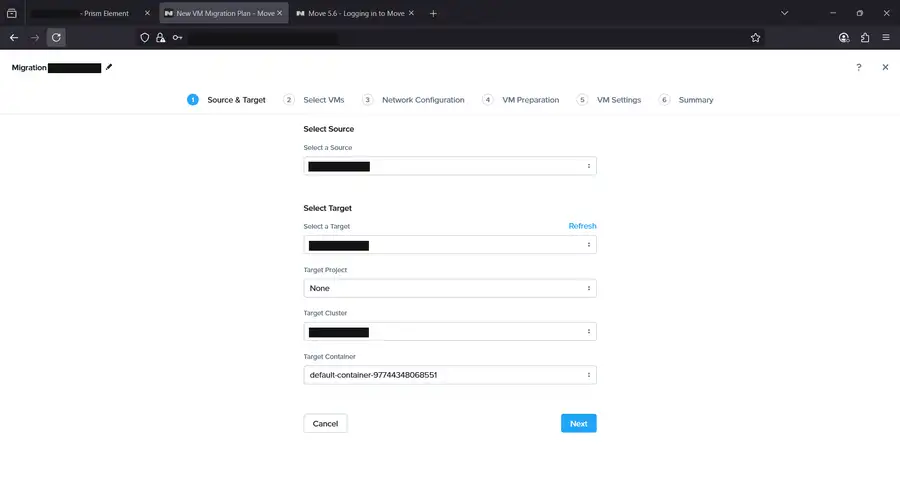
Step one is source and target: pick the registered source environment, then the target cluster, an optional target project, and the storage container the migrated VMs’ disks will land on.
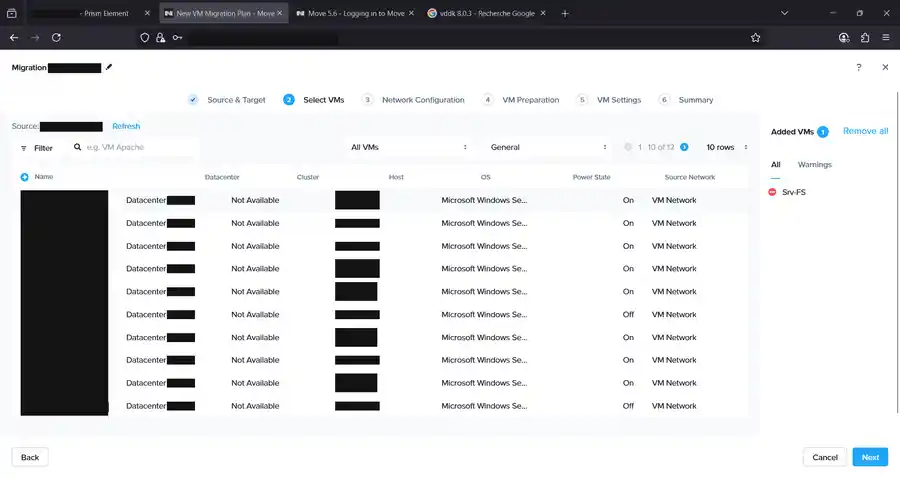
Step two lists every VM Move can see in the source environment — datacenter, cluster, host, guest OS, power state and source network — so you can pick exactly which ones belong in this batch. Selected VMs collect in the “Added VMs” panel on the right, with any warnings flagged there too.
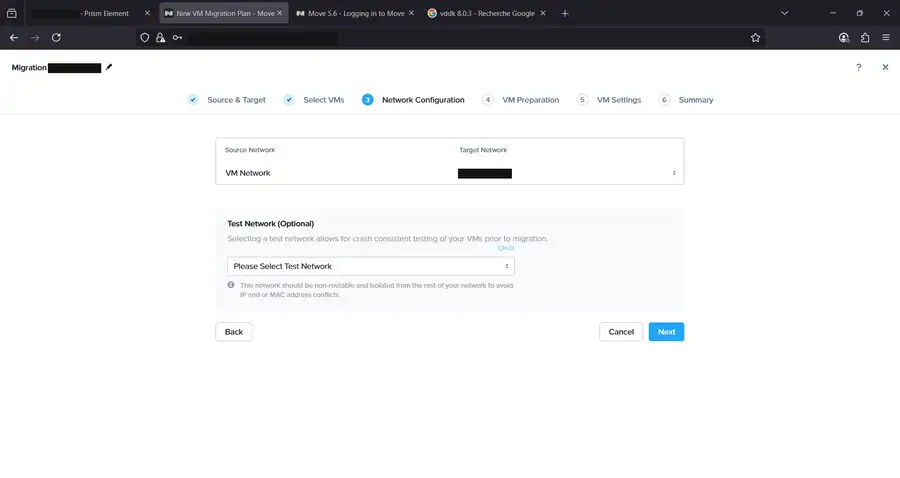
Step three maps source networks to target networks on AHV, with an optional isolated test network for crash-consistent testing of the migrated VM before cutover.
VM preparation and guest credentials
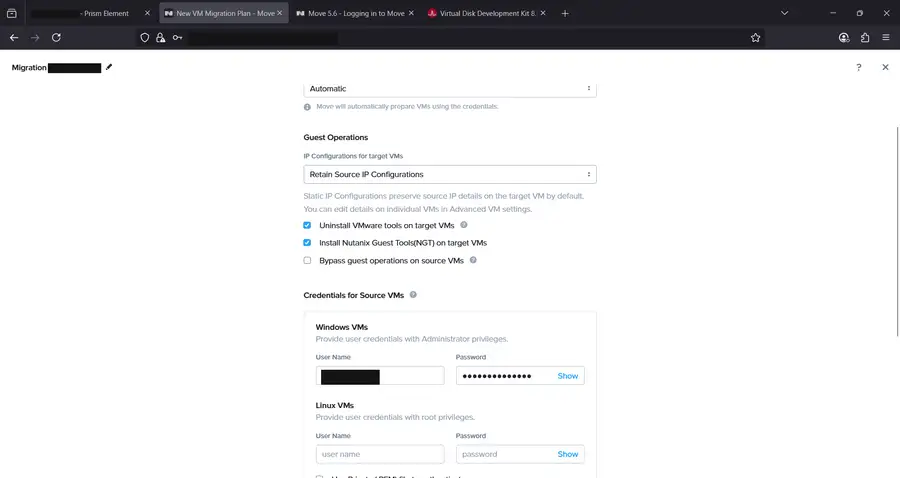
Step four controls how Move prepares the guest OS for AHV — normally left on “Automatic,” which uninstalls VMware Tools, installs Nutanix Guest Tools (NGT), and retains the source IP configuration on the target VM. This step is also where credentials with administrator (Windows) or root (Linux) privileges are supplied, since Move needs to log into the guest to run the preparation steps.
VM settings: priority, timezone and migration type
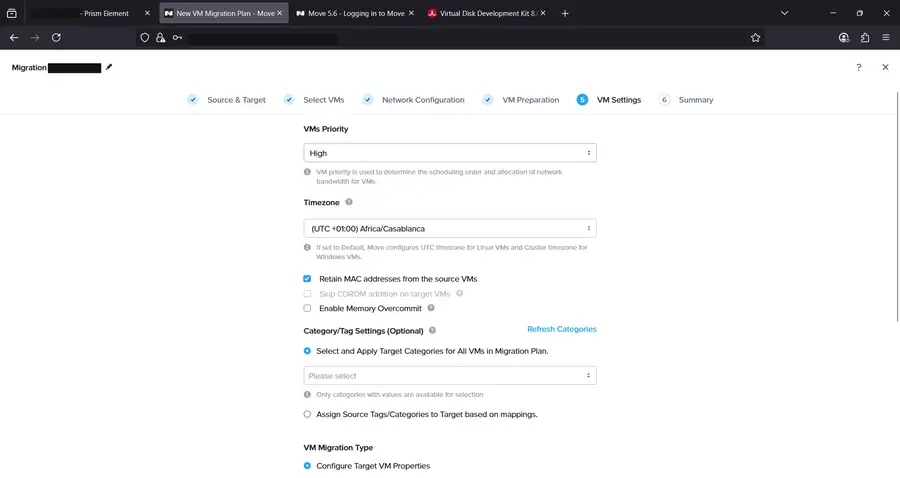
The last configuration screen sets migration priority (which affects scheduling and bandwidth allocation when several plans run at once), the timezone applied to migrated VMs, whether to retain MAC addresses from the source, and any target categories to apply.
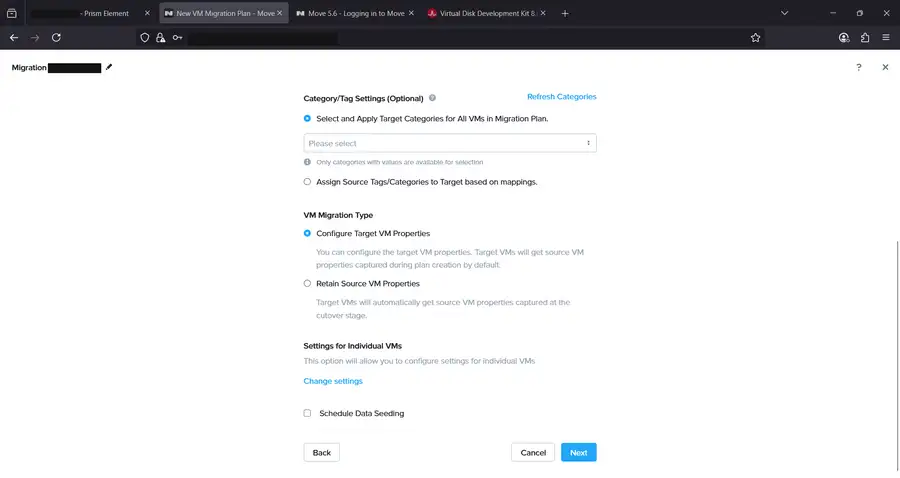
It also decides how target VM properties are handled — either configured up front from the values captured at plan creation, or picked up fresh from the source at cutover time — and offers per-VM overrides plus an optional scheduled data-seeding start time.
Monitoring migrations
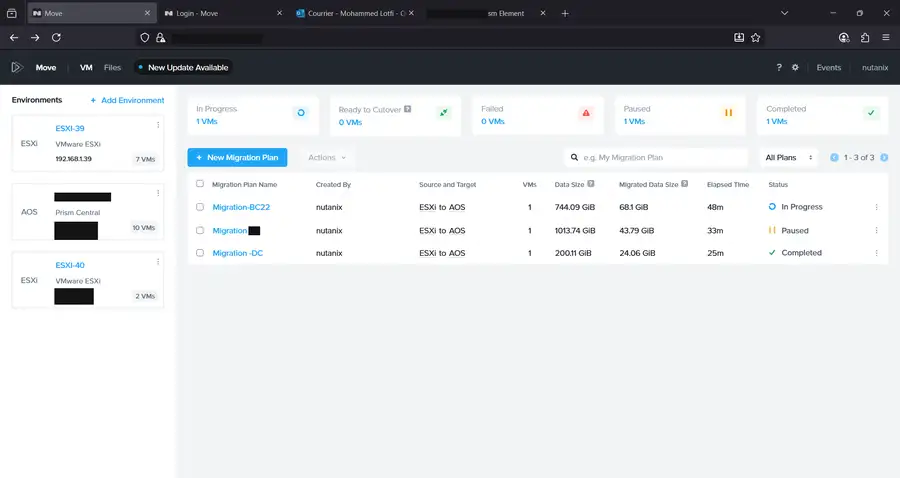
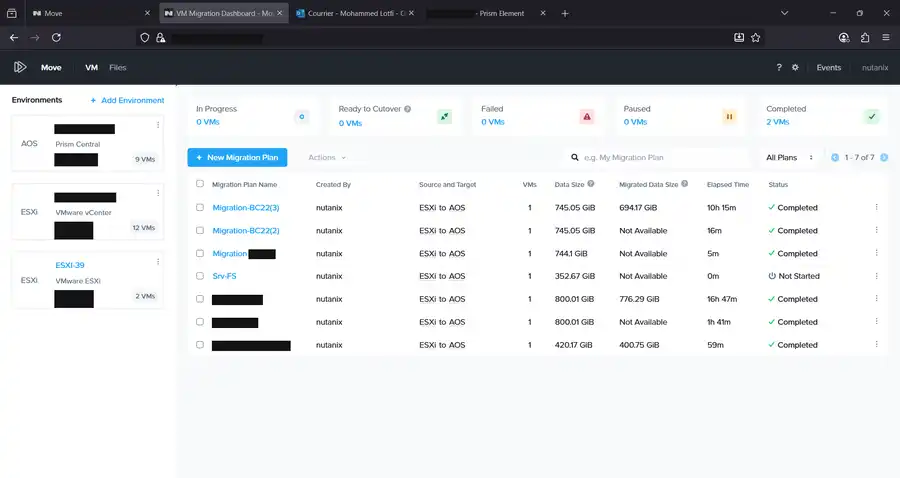
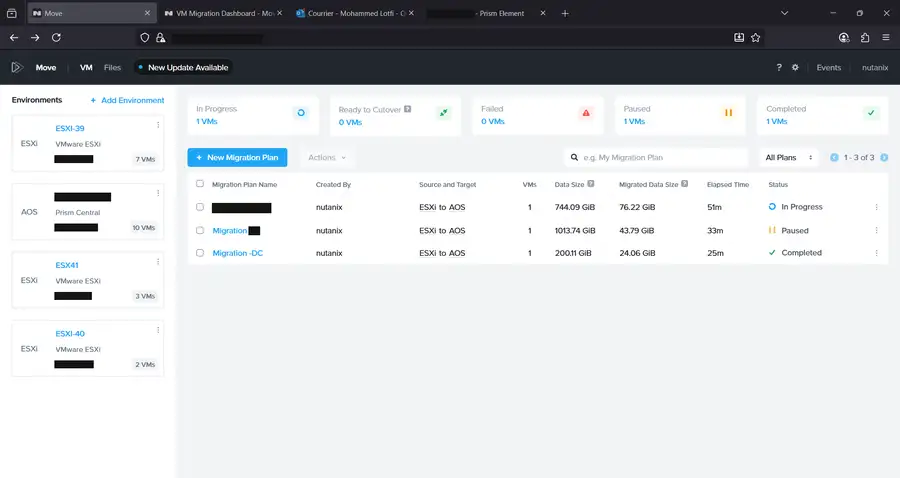
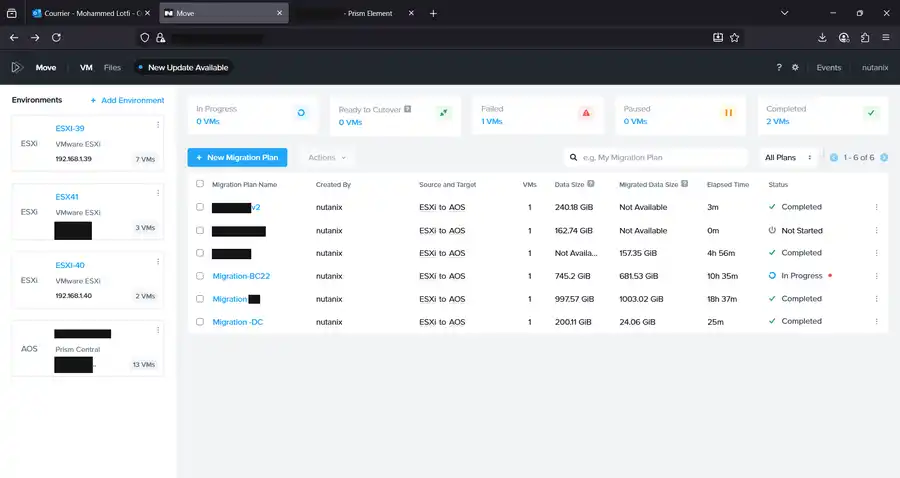
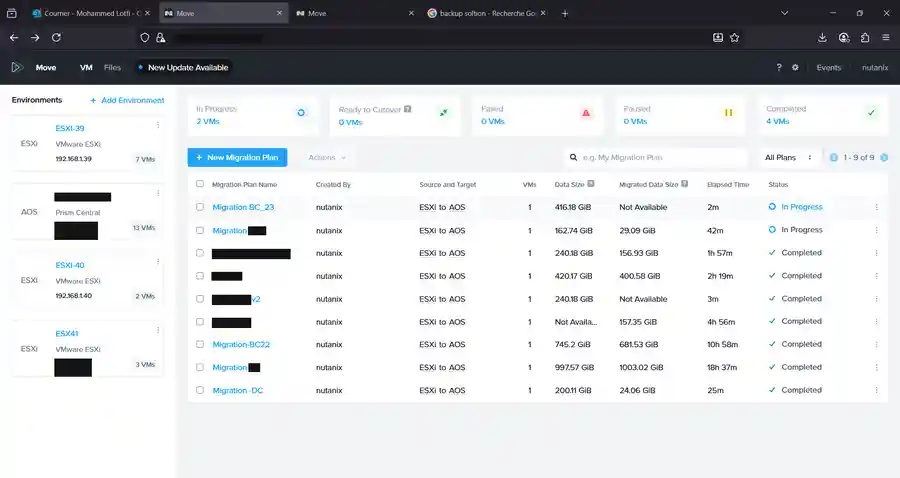
Once a plan is running, the dashboard becomes the main thing you watch: counts of VMs In Progress, Ready to Cutover, Failed, Paused and Completed across every plan, with per-plan data size, migrated size and elapsed time.
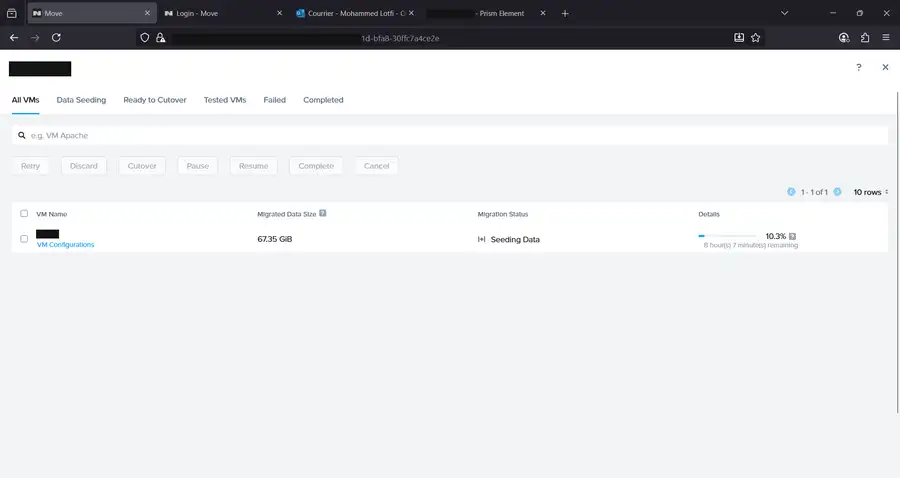
Drilling into a plan shows individual VM progress — here a VM is 10% through data seeding with an estimated time remaining, which for large disks over a WAN link can run into hours.
As more environments and plans get added over the course of a multi-VM migration, the dashboard fills out accordingly — additional ESXi hosts and AHV/Prism Central targets on the left, and a growing plan history on the right.
Troubleshooting: two real errors from the field
Not every VM sails through on the first attempt. Two issues came up during this project that are worth documenting because they’re both easy to misdiagnose.
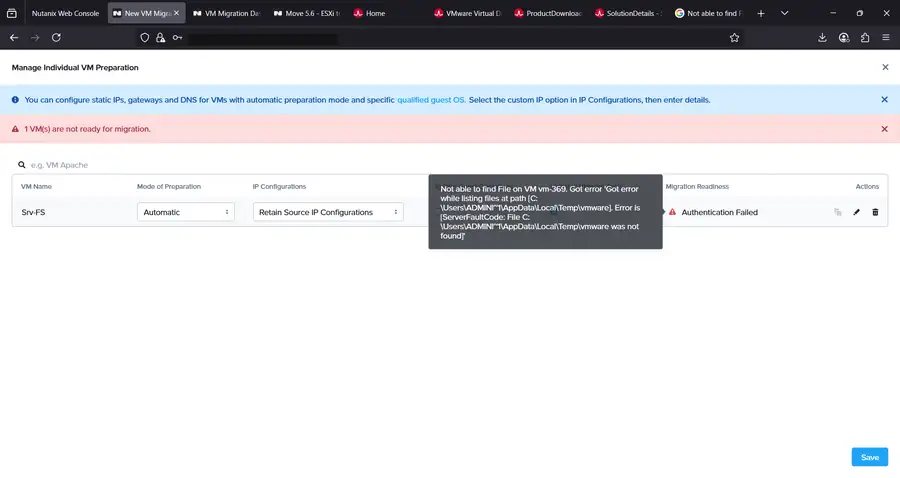
1. “Not able to find File on VM… Got error while listing files at path” — one VM failed preparation with an authentication error and a file-not-found message pointing at a path under AppData\Local\Temp\vmware. This turned out to be a stale VMware Tools state on the guest: Move logs into the VM to stage its preparation payload in a VMware Tools temp folder, and if that folder is missing or the guest’s VMware Tools service is in a bad state, the file operation fails even though the credentials themselves are correct. Restarting the VMware Tools service (or reinstalling Tools where it was severely out of date) on the source VM before retrying the migration step resolved it.
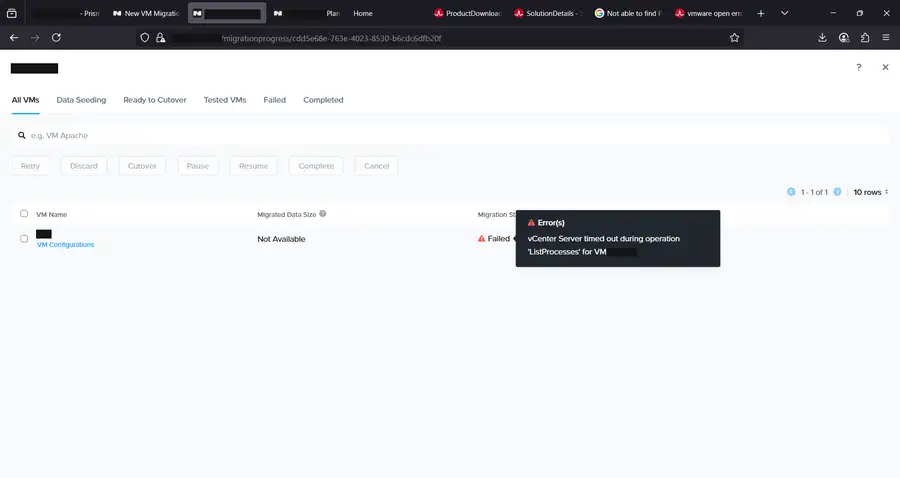
2. “vCenter Server timed out during operation ‘ListProcesses’ for VM” — a different VM failed later, during the active migration phase, with a vCenter API timeout. Unlike the first error this wasn’t guest-side; it was vCenter itself taking too long to respond to a routine guest-operations call Move makes to track progress inside the VM. This is typically transient — caused by vCenter load, a slow ESXi host, or network latency between Move and vCenter — and in our case a straightforward retry of the migration cleared it on the next pass without any configuration changes.
Wrap-up
End to end, Move turned what would otherwise be a manual, error-prone P2V-style migration into a repeatable workflow: register the environments once, build a plan per batch of VMs, let data seeding run in the background, and cut over with minimal downtime once everything is ready. The two failures we hit were both recoverable without touching the migration plan itself — one was a guest-agent hiccup, the other a transient API timeout — which is generally what to expect from Move issues in practice: check the guest’s VMware Tools health first, and treat vCenter timeouts as a cue to retry before assuming something is fundamentally broken.