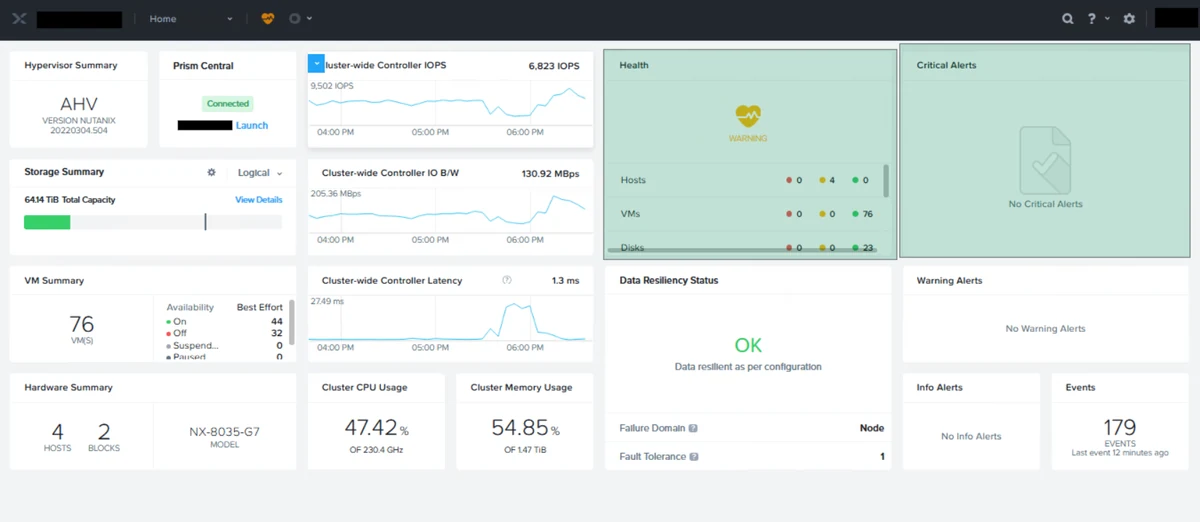
Controller VM memory is one of those settings that gets chosen once, at deployment, and then quietly stops being right. The cluster grows, you enable a few more services, VM count creeps up — and one morning Prism raises a critical alert telling you RAM usage on a CVM is high. The good news is that increasing CVM memory is a supported, non-disruptive operation you can do yourself from Prism Element in about five minutes.
This walkthrough covers the whole thing: what the alert looks like, the constraints worth knowing before you start, the steps, and the before/after on a real four-node cluster I recently resized from 24 GB to 36 GB per CVM.
The alert
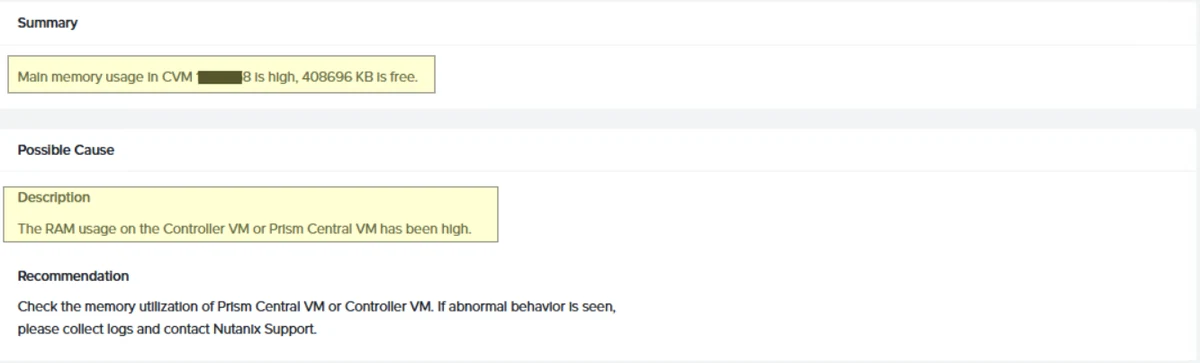
It shows up as a critical alert with a fairly blunt summary — main memory usage in the CVM is high, with the free memory reported in KB:
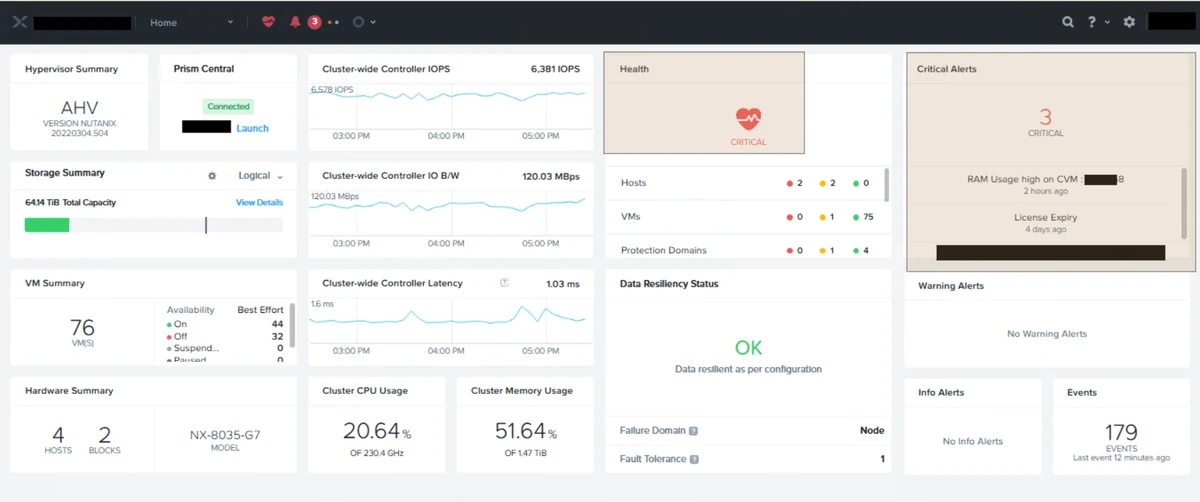
On the cluster in question this was one of three critical alerts on the home dashboard:
Before changing anything, confirm the picture from the VM table. Go to the VM page, switch to Table, tick Include Controller VMs and filter on cvm. That gives you every CVM with its memory capacity and current usage side by side:
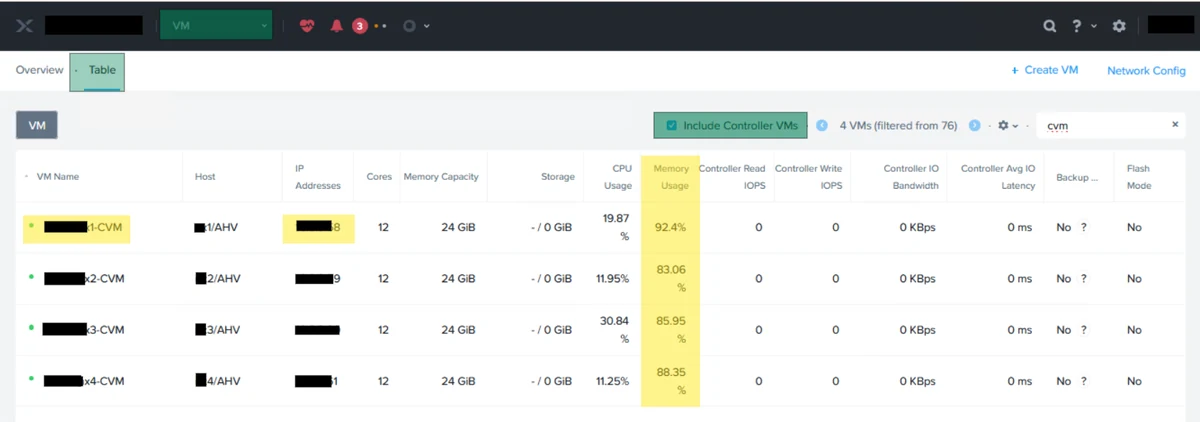
All four CVMs sitting in the mid-to-high 80s, with one at 92.4%, is not a one-off spike — that’s a cluster that has outgrown its original sizing. This is the case where adding memory is the right answer rather than a workaround.
Before you start
Three things worth understanding before you touch the setting.
Resizing requires a CVM restart, but it is not disruptive. AOS restarts one CVM at a time and waits for it to come back before moving to the next, so the cluster keeps serving I/O throughout and there’s no production impact. You don’t need a maintenance window for this, though I’d still avoid running it during a backup window or alongside other maintenance.
64 GB is the ceiling through Prism Element. You can allocate up to 64 GB per CVM from the web console. If you need to go beyond that, it’s a Nutanix Support conversation rather than a self-service change.
The setting only ever increases memory. AOS applies your target to any CVM currently below it and leaves the rest alone. So if a CVM is at 20 GB and you select 28 GB, it goes up to 28 GB. But if a CVM is already at 48 GB and you select 28 GB, it stays at 48 GB — the value is a floor, not an absolute. You cannot shrink a CVM this way.
And the usual precondition: run a full NCC health check first and make sure nothing else is wrong with the cluster. Restarting CVMs one after another is safe on a healthy cluster; it is not something to start on a cluster that already has a node down or a rebuild in progress.
Step 1 — Open Configure CVM
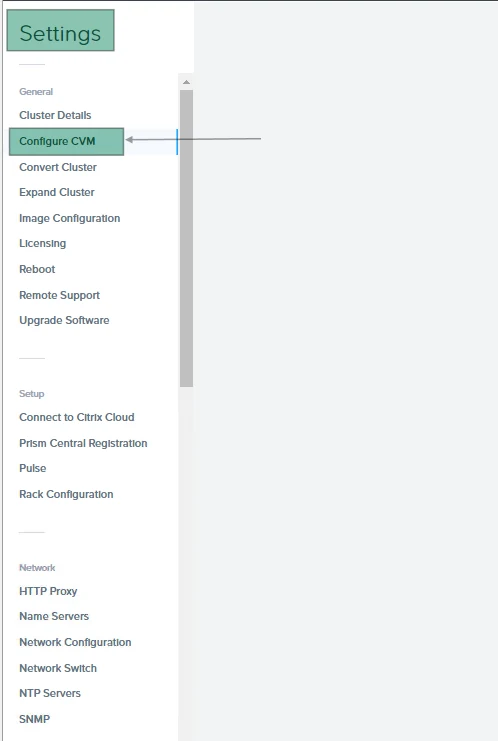
Log in to Prism Element, then from the dropdown menu to the left of the main menu select Settings. In the General section of the left navigation pane, click Configure CVM:
Step 2 — Select the target memory size
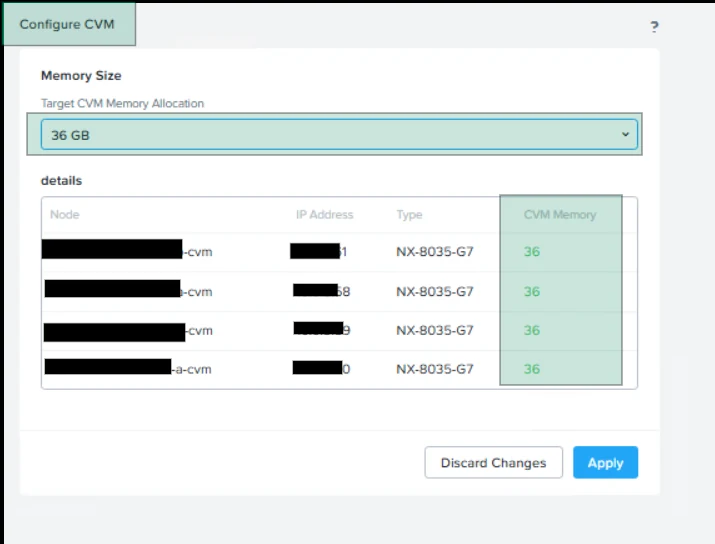
The Configure CVM page shows a Target CVM Memory Allocation dropdown and a table listing every node, its IP, its model and its current CVM memory. Pick your target size — 36 GB in this case — and the table previews what each CVM will end up with:
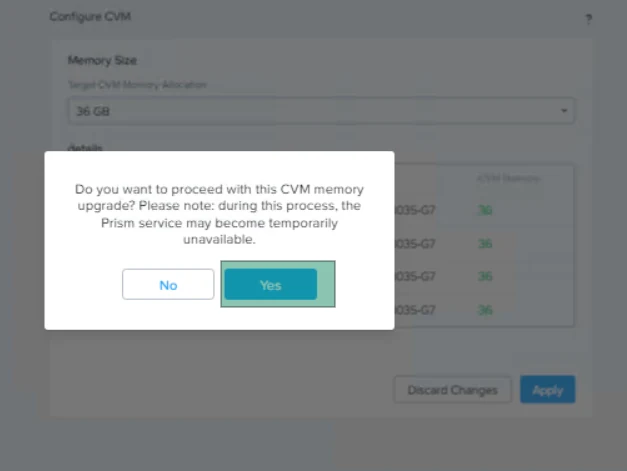
Click Apply. Prism asks you to confirm, and it’s worth reading the warning: during the process the Prism service itself may become temporarily unavailable. That’s expected — Prism runs on the CVMs, so when the CVM hosting it restarts, the console blips. Cluster I/O is unaffected. Click Yes:
Step 3 — Wait for it to work through the nodes
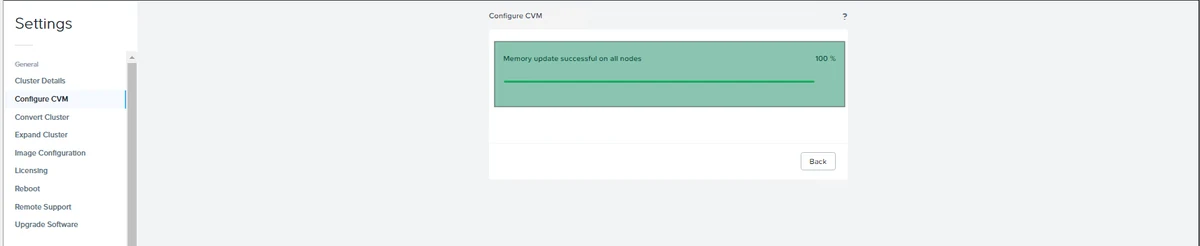
From here it’s hands-off. AOS works through the CVMs one at a time. If the console drops out momentarily, give it a minute and reconnect — that’s the Prism leader moving, not a failure. When it finishes you get a straightforward confirmation:
Step 4 — Verify
Go back to the VM table and check the CVMs again. Memory capacity should show the new size, and usage should have dropped proportionally:
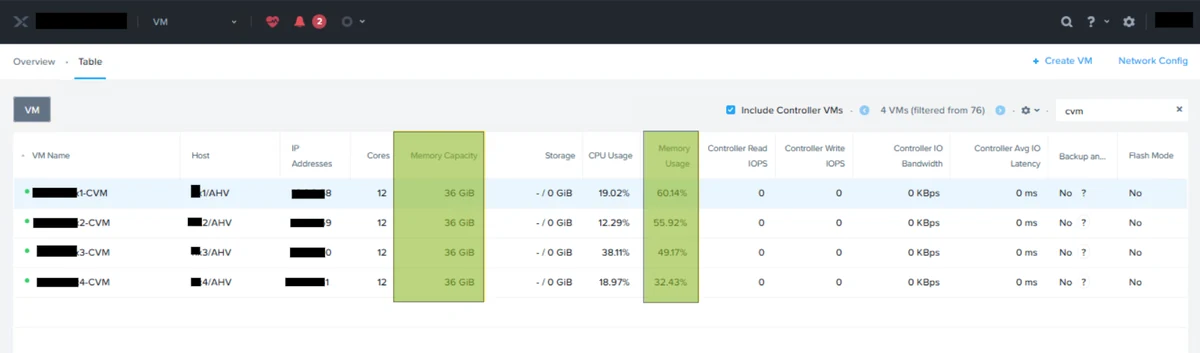
The change on this cluster:
- CVM memory went from 24 GiB to 36 GiB on all four nodes.
- Memory usage dropped from 83–92% to 32–60%.
- The highest CVM went from 92.4% to 60.14%.
And the home dashboard tells the same story — the RAM usage alert is gone and cluster health is back to a normal state: