
Upgrading a Nutanix cluster is one of those jobs that looks intimidating the first time and routine the tenth. Life Cycle Manager (LCM) does most of the heavy lifting — dependency resolution, rolling reboots, VM evacuation — but the order you do things in, and what you check before you press Apply, is still on you. This is the full sequence from a recent engagement, run entirely from Prism Element: inventory, then NCC, Foundation, AOS, firmware and finally AHV. Screenshots are from the actual cluster, with customer identifiers, addresses and dates redacted; version numbers are left intact because they’re the useful part.
Before you start
Nutanix’s own recommendations for LCM updates are short and worth following to the letter. The ones that matter most in practice:
- Do it in a maintenance window. Even though workloads live-migrate, users can see latency during the upgrade — noticeably so on clusters that only have 1GbE uplinks.
- Non-production first. Run the same sequence on a test or secondary cluster before touching production. The cluster in this walkthrough is a test environment for exactly that reason.
- Check the compatibility matrix. Nutanix publishes upgrade paths and interoperability (“what works with what”) on the portal. Check it before you start, not when LCM warns you.
- Prism Central before Prism Element. If the cluster is registered to Prism Central, PC must be on a compatible version before you upgrade AOS on the cluster. LCM will remind you — we’ll see that screen later — but it’s better to have already done it.
- Deal with VMs that can’t live-migrate. Anything that can’t move needs to be powered off or reconfigured before a host-reboot update (hypervisor, firmware), or the update stalls trying to evacuate the host. VMs with
ha_priority=-1should be set as agent VMs so LCM handles them correctly. - Silence email alerts temporarily. A rolling upgrade generates a flood of expected alerts. Disable email alerting in Prism for the window and re-enable it afterwards.
- One operation at a time. Wait for each LCM task to complete fully before starting the next. Don’t queue, don’t overlap.
Step 1 — Run the inventory
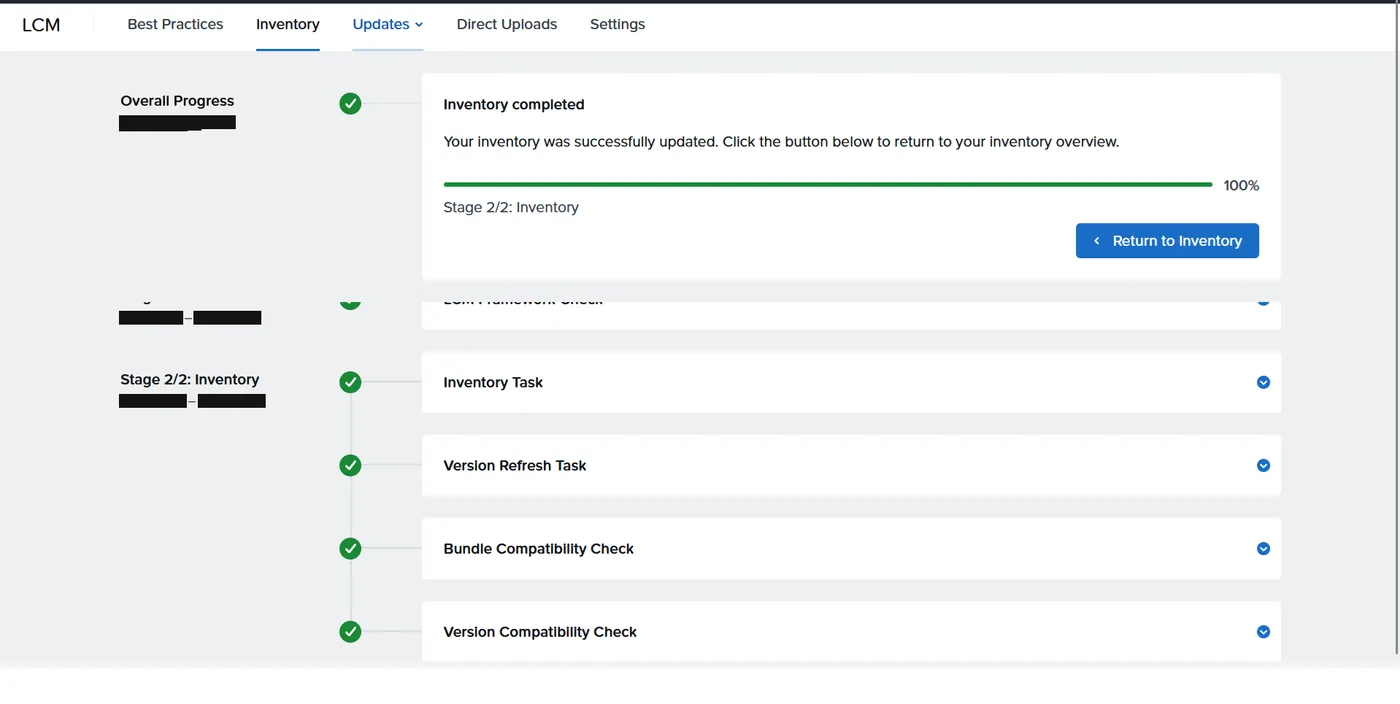
Everything in LCM starts with an inventory. It scans the cluster, refreshes the available version list from the Nutanix portal, and runs bundle and version compatibility checks. Until this has completed, the Updates tab is either empty or stale.
Step 2 — Review what LCM found
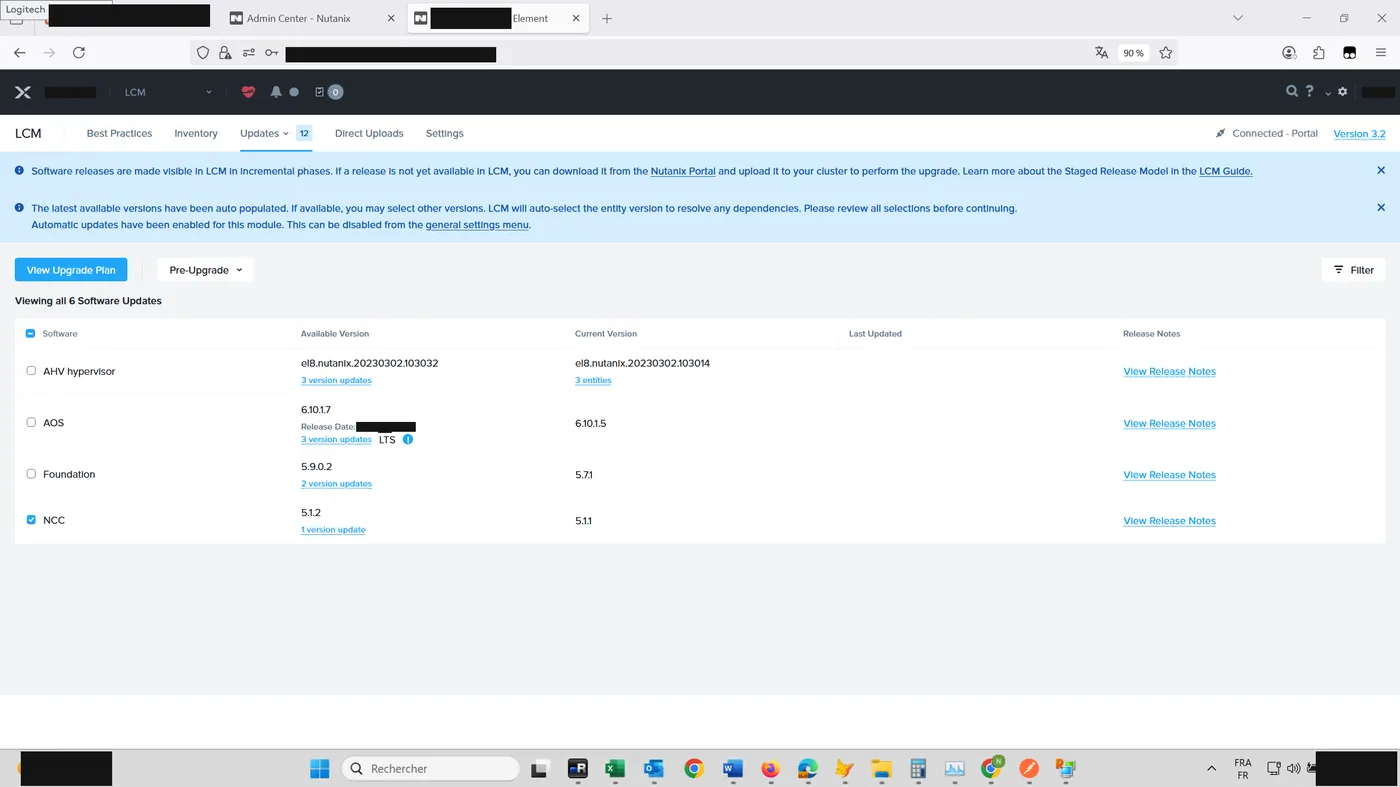
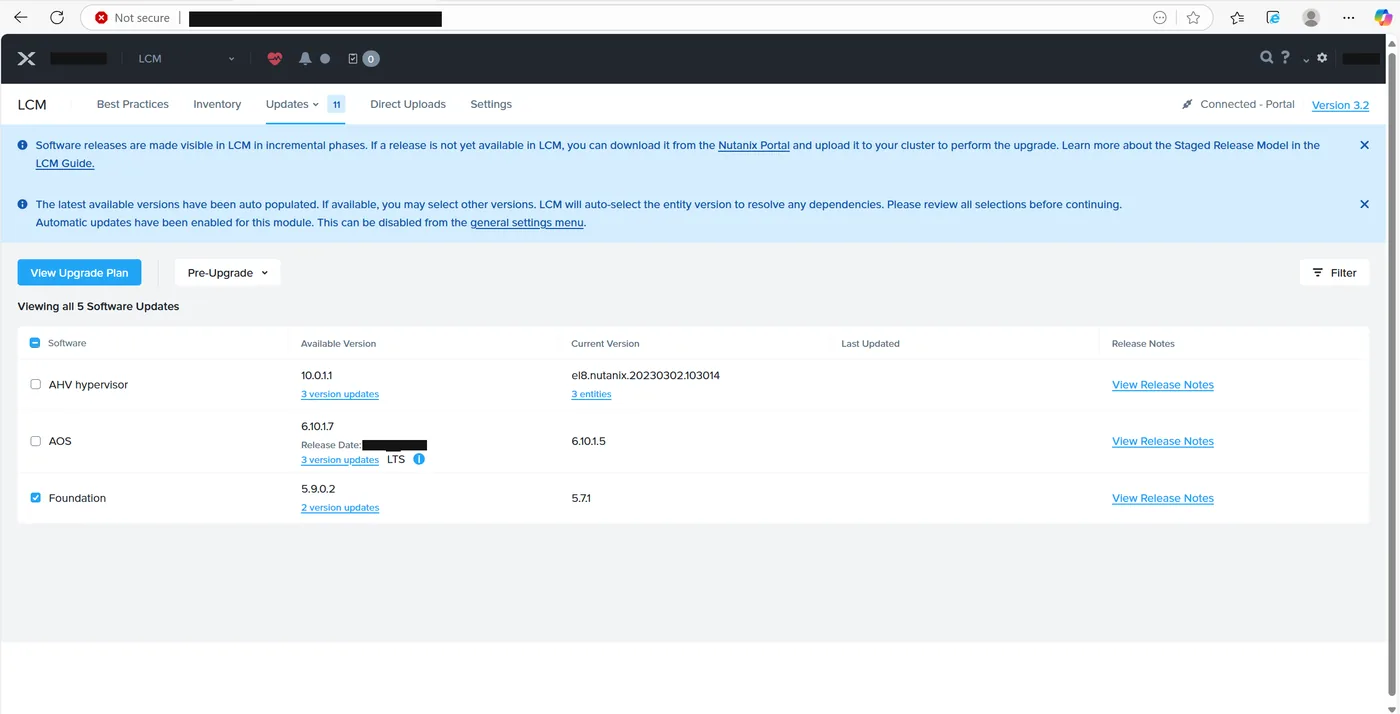
The Updates tab lists everything with a newer version. On this cluster that was AHV, AOS (6.10.1.7 offered as the LTS target against 6.10.1.5 installed), Foundation 5.9.0.2 against 5.7.1, and NCC 5.1.2 against 5.1.1. Note the banner at the top: Nutanix releases software into LCM in incremental phases, so a version you know exists may not appear immediately — in which case you download it from the portal and use Direct Uploads.
The order we’re going to follow keeps the tooling ahead of the platform: NCC and Foundation first, then AOS, then firmware, then the hypervisor.
Step 3 — NCC
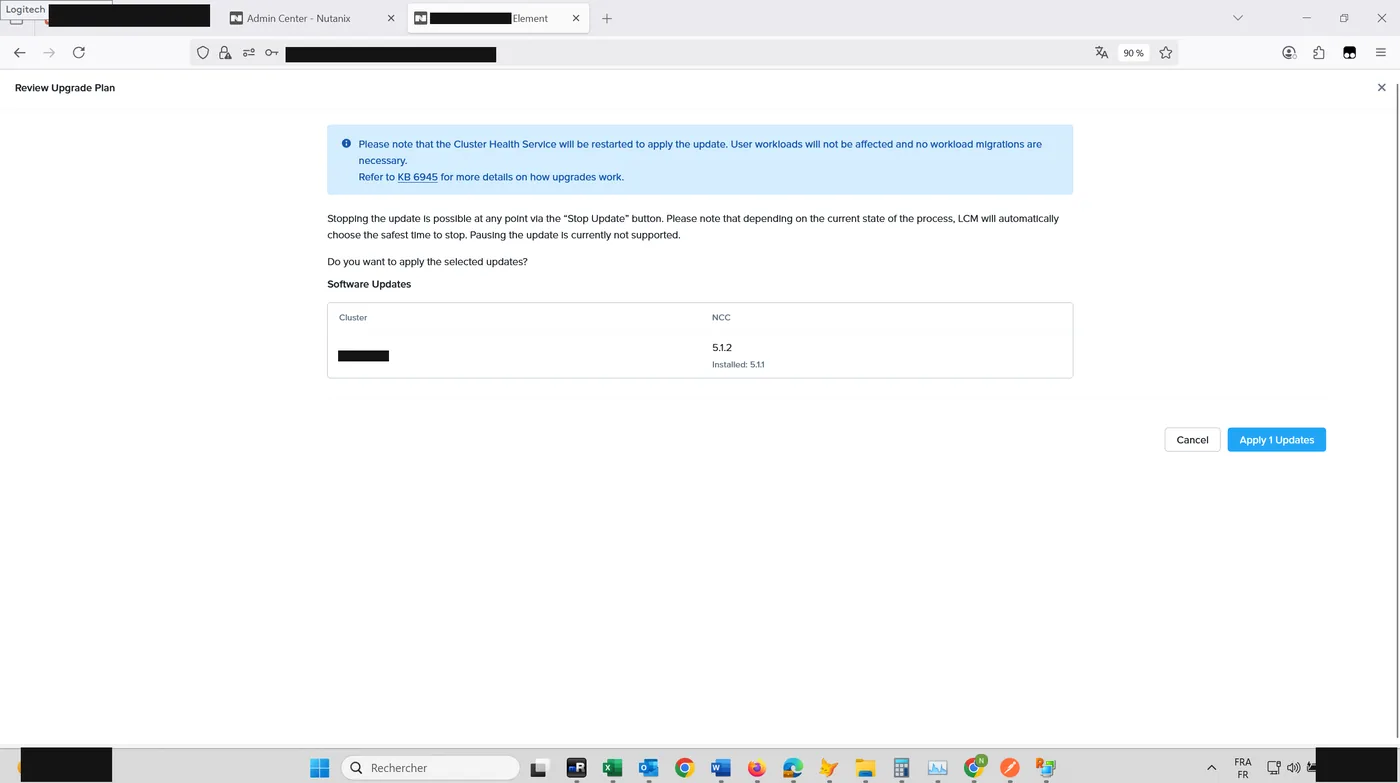
Nutanix Cluster Check is the health-check framework, and upgrading it first means every subsequent precheck runs against the latest set of checks. Selecting NCC and clicking View Upgrade Plan brings up the review dialog. Read the impact statement every time: for NCC it’s simply that the Cluster Health Service restarts, with no workload impact.
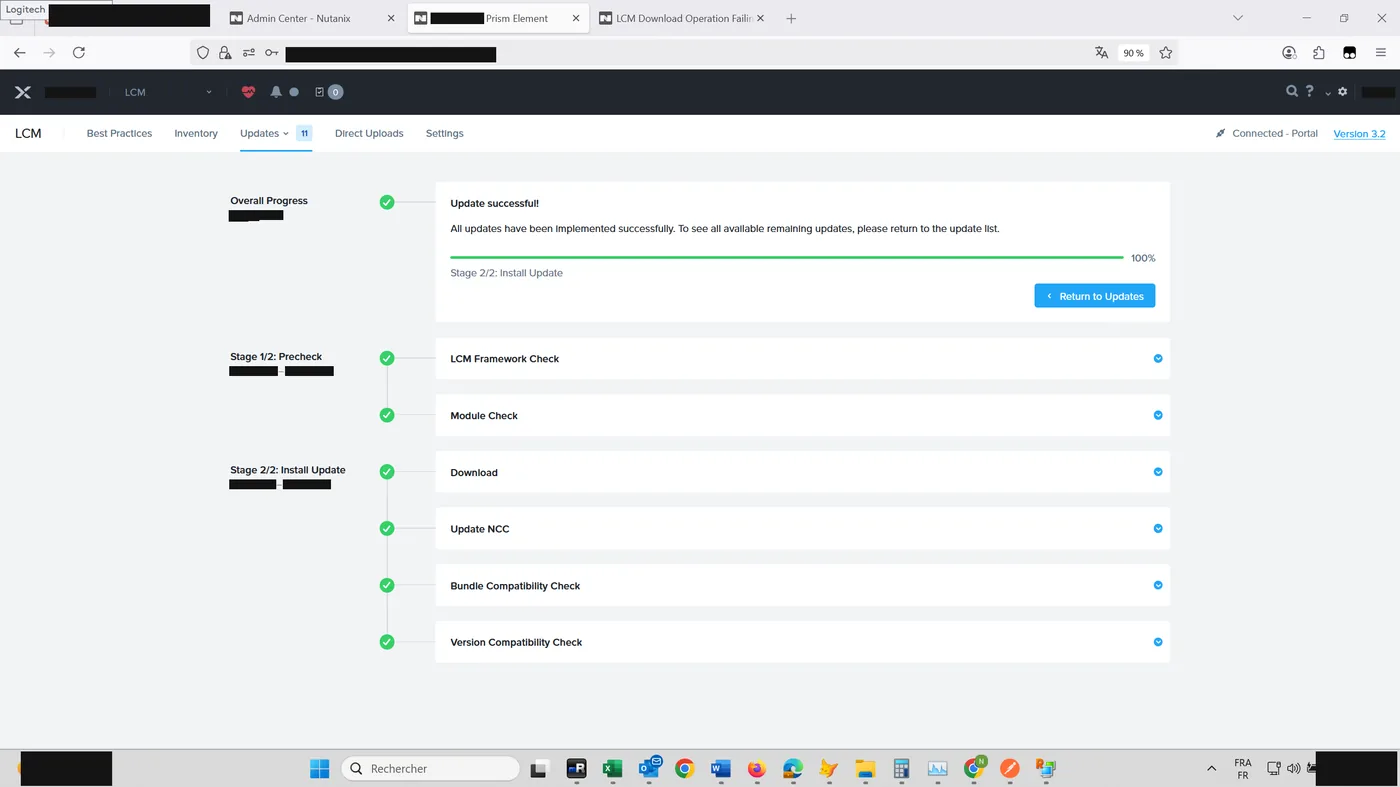
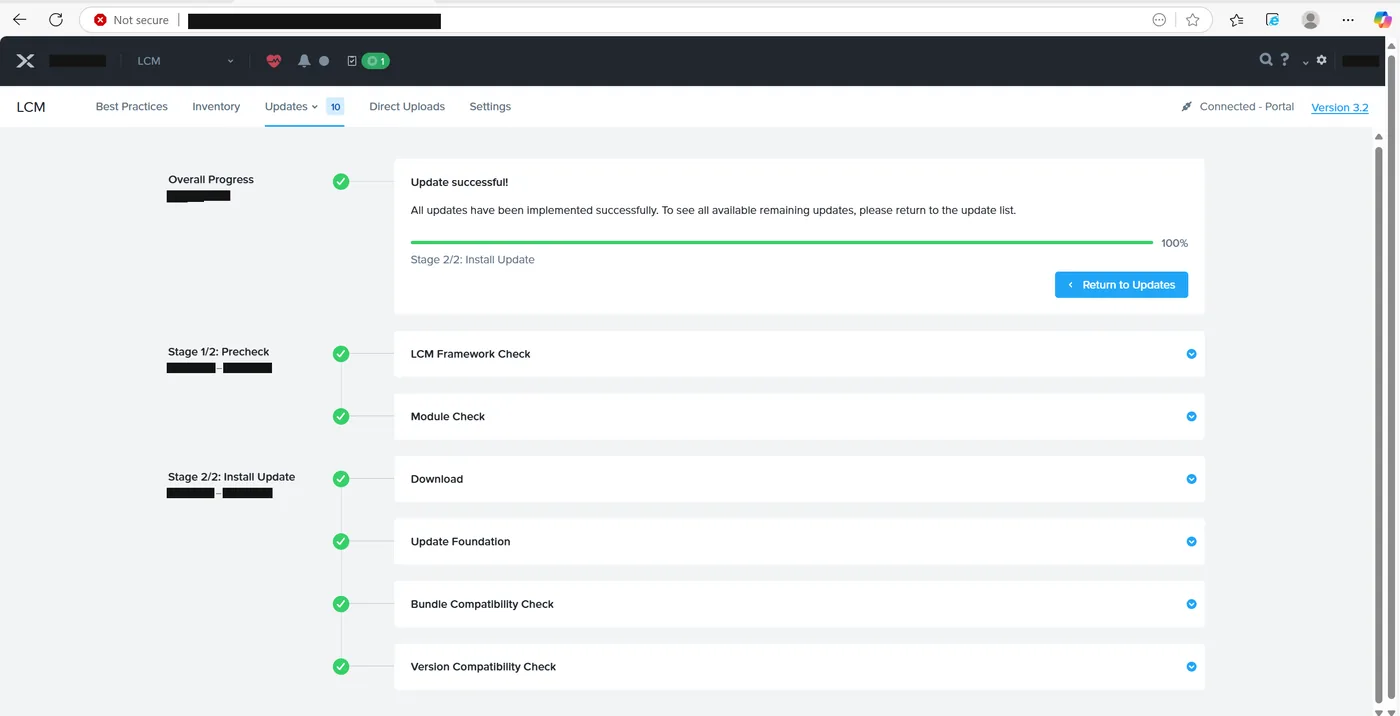
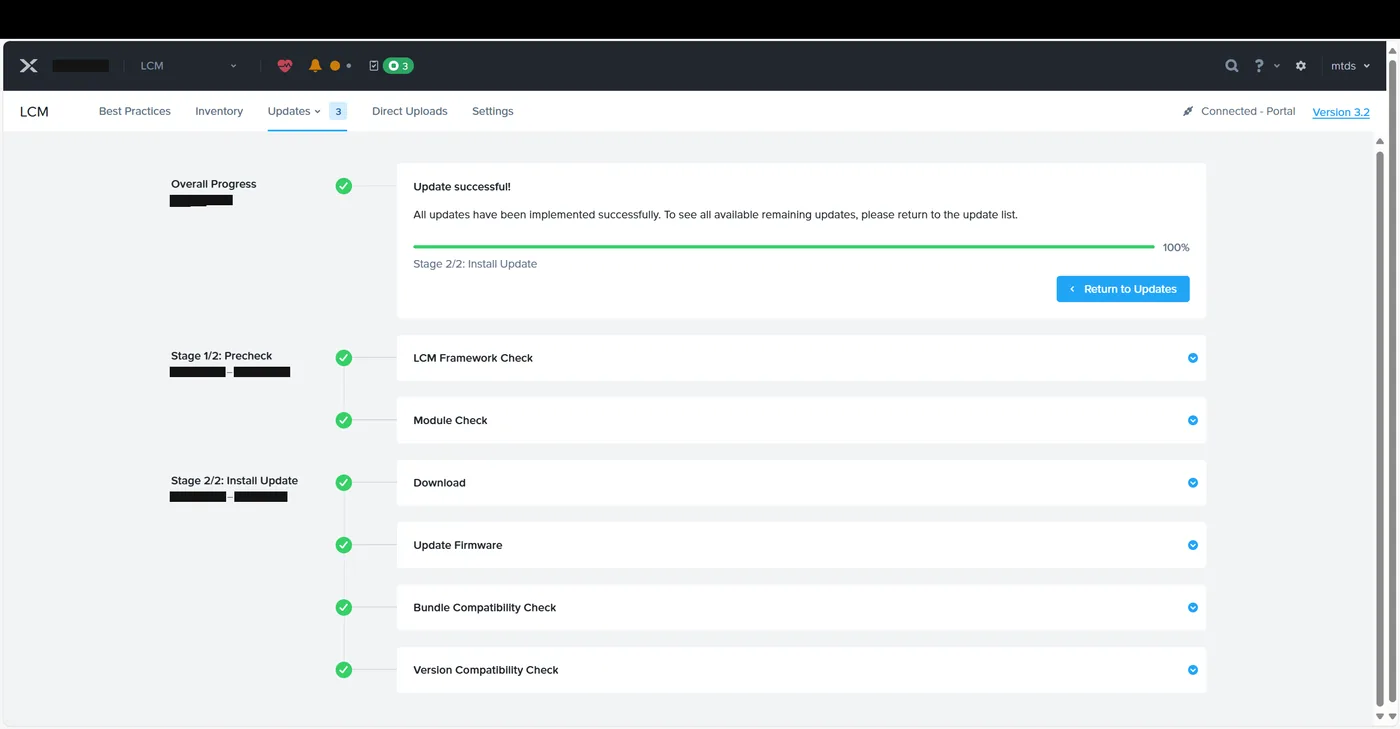
Every LCM run follows the same two stages. Precheck runs an LCM framework check and a module check; Install downloads the bundle, applies it, then runs bundle and version compatibility checks again. NCC finishes in a few minutes.
Step 4 — Foundation
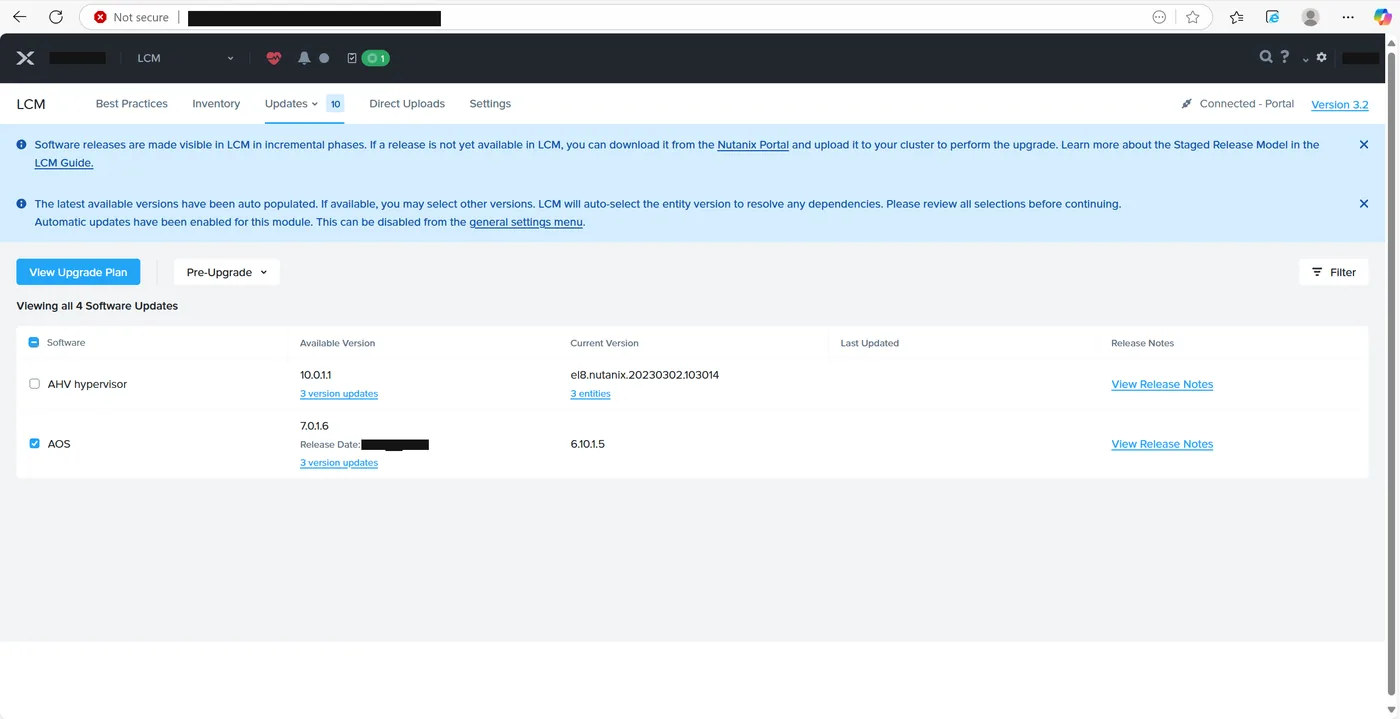
Back on the Updates tab, something worth noticing: after the NCC update and its inventory refresh, LCM is now offering AHV 10.0.1.1 where it previously showed only an el8 build. This is the staged release model in action — what’s available can change between runs, which is another reason to re-check the list after each update rather than planning everything from the first screenshot.
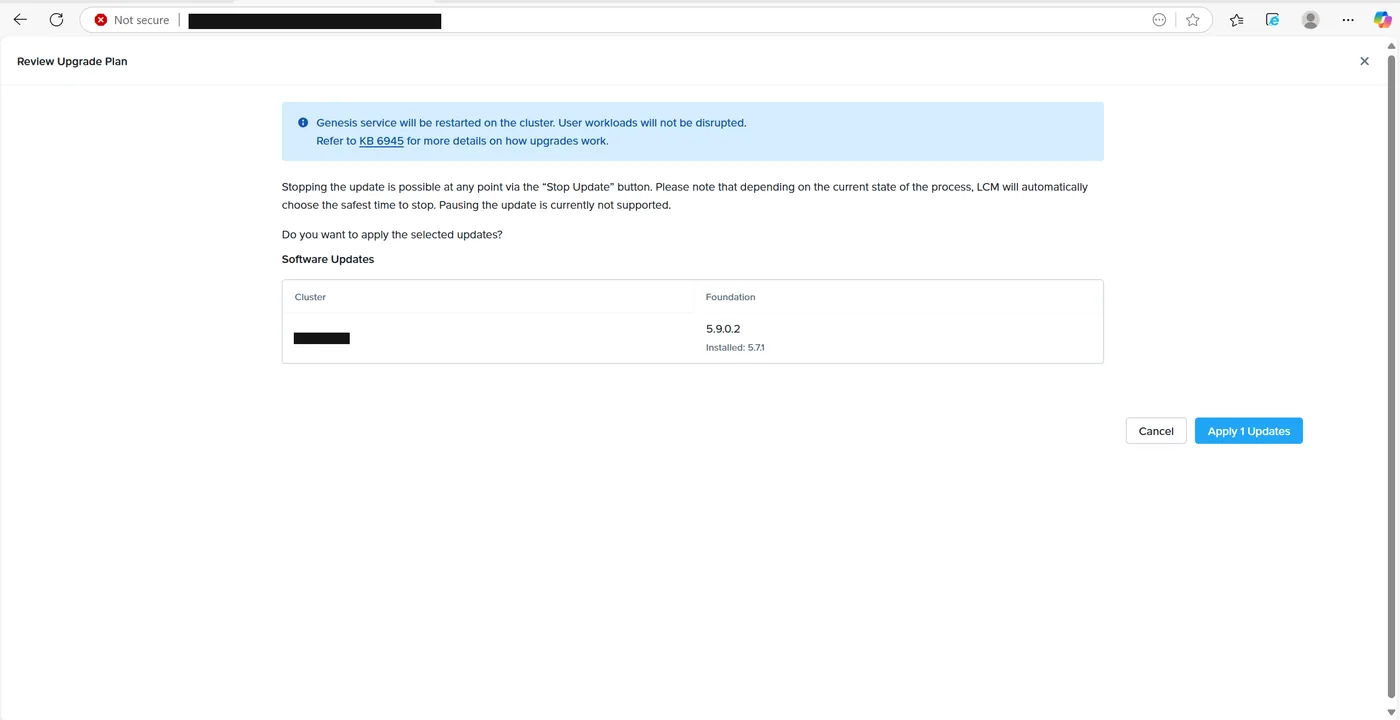
Foundation is the imaging and node-expansion tool, and AOS upgrades depend on it. Its plan review notes a Genesis service restart, again with no disruption to workloads.
Step 5 — AOS
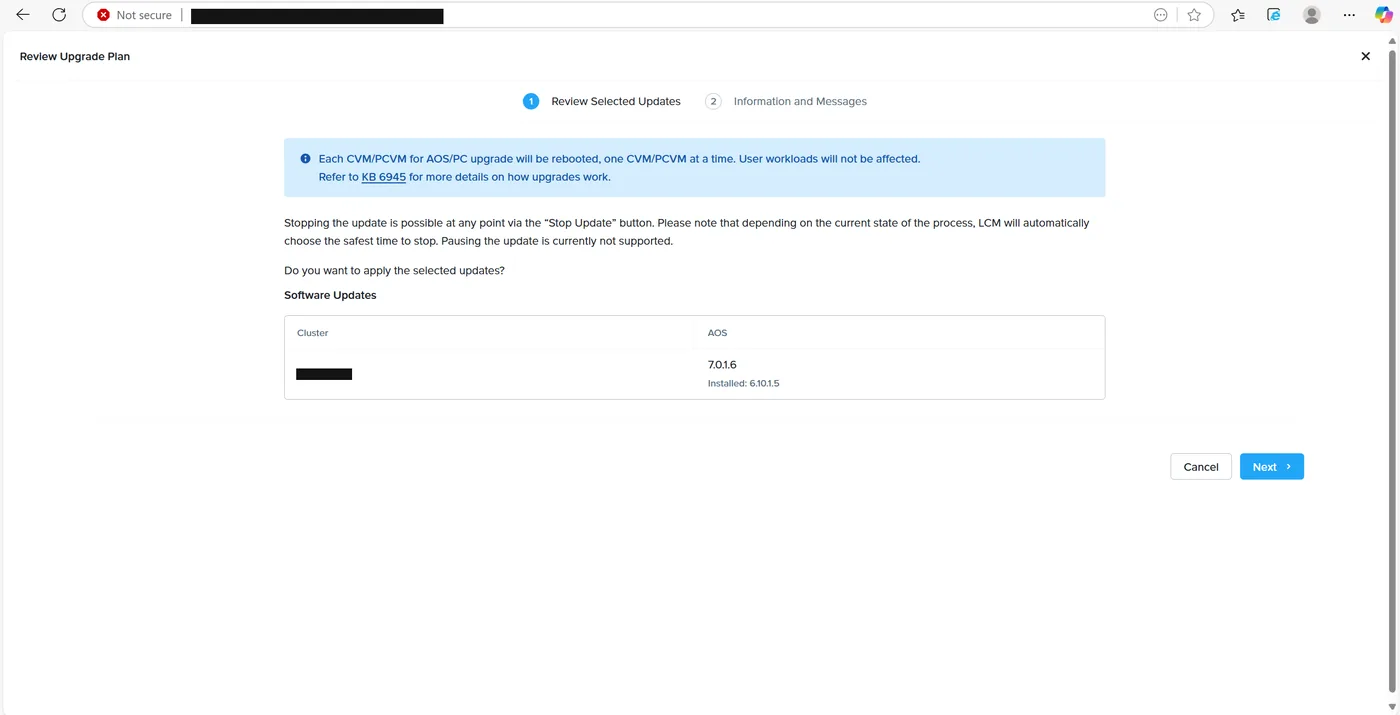
With the tooling current, the AOS upgrade. By this point LCM had auto-populated AOS 7.0.1.6 as the target, moving the cluster from the 6.10 line onto 7.x. LCM auto-selects the latest available version to resolve dependencies, but you can pick a different one from the dropdown if your compatibility matrix or Prism Central version says you should — check before accepting the default.
The AOS plan review has two steps. The first is the impact statement: each Controller VM is rebooted in turn, one at a time, with no effect on user workloads — the cluster stays up because the other CVMs carry the storage path while each one restarts.
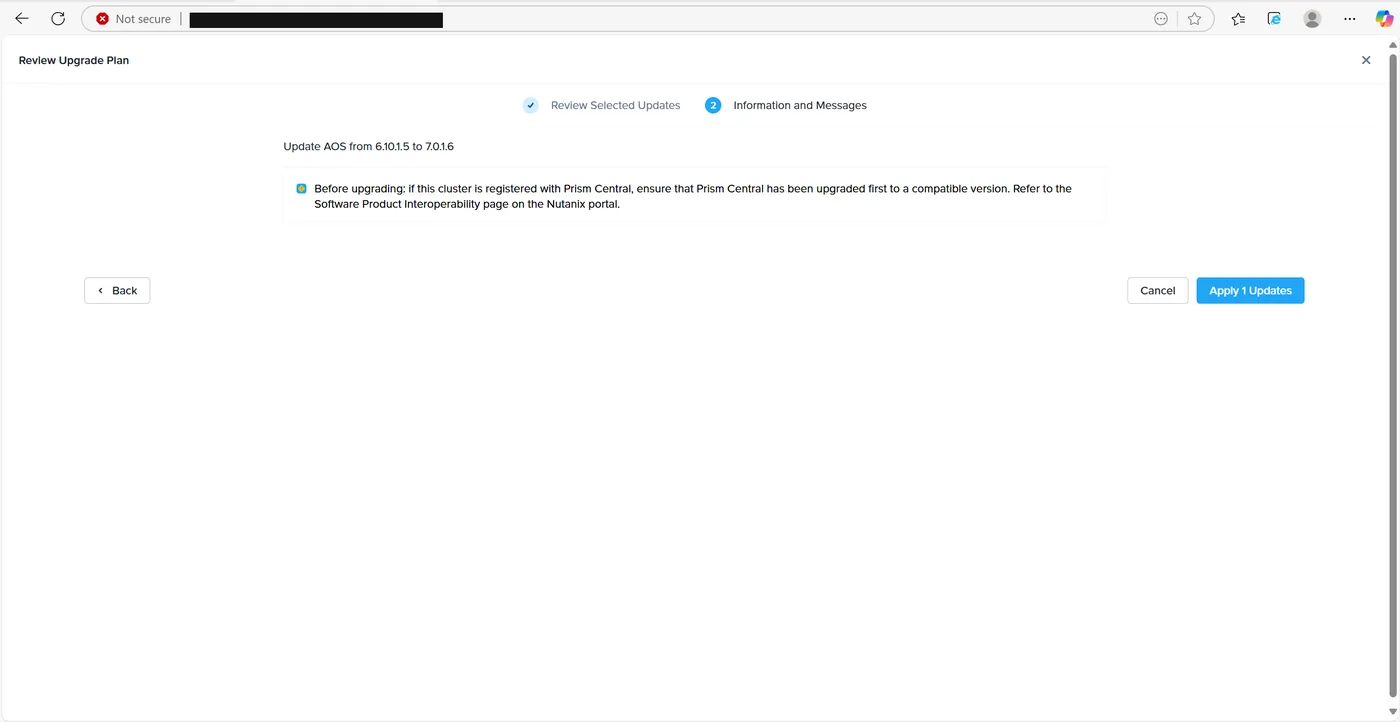
The second step is the one people click through and shouldn’t. It’s the explicit warning: if this cluster is registered with Prism Central, upgrade Prism Central first to a compatible version. Running AOS ahead of PC is one of the most common ways to end up with a cluster PC can’t manage. If you haven’t done it yet, cancel here and go do it.
Step 6 — Firmware
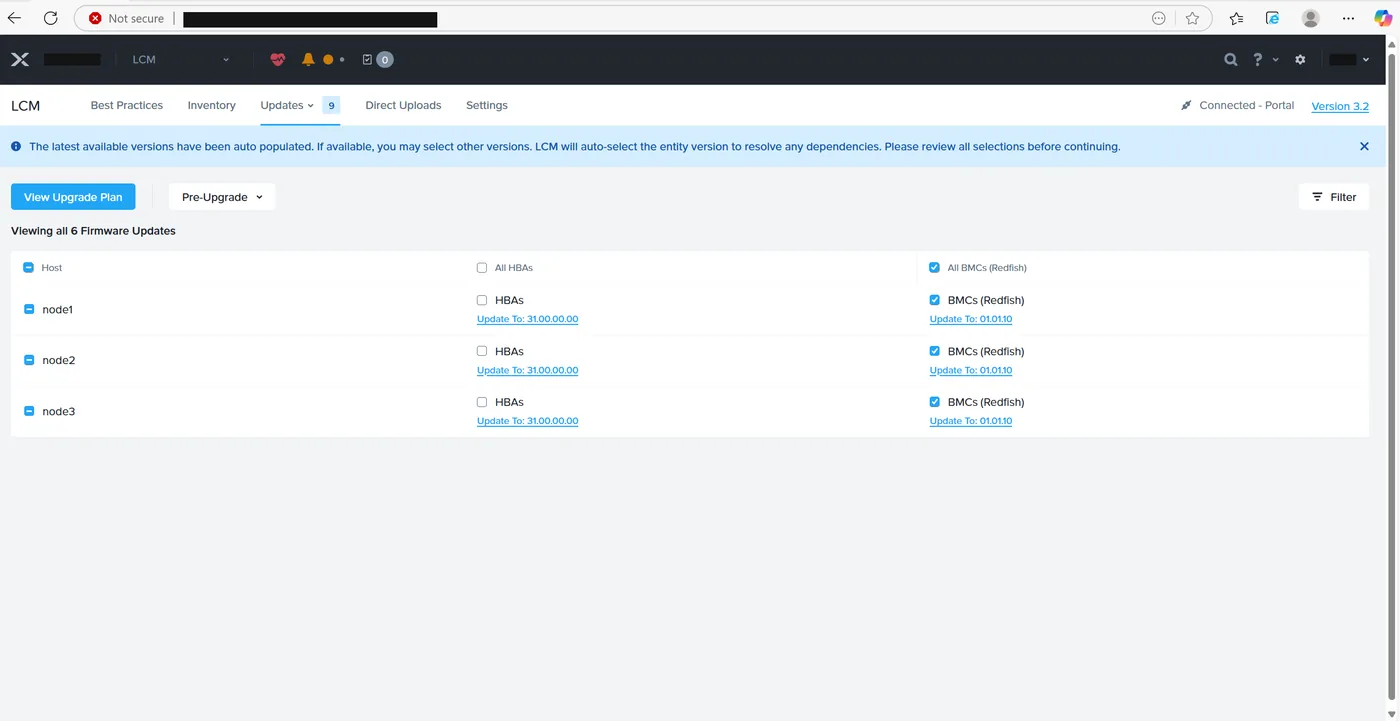
Once AOS is on the new version, the Firmware Updates view lists what’s outstanding on each node. Here that was HBA firmware (to 31.00.00.00) and BMC firmware via Redfish (to 01.01.10) across all three nodes. The Redfish path lets BMC updates happen without booting the node into a separate environment, so BMC went first.
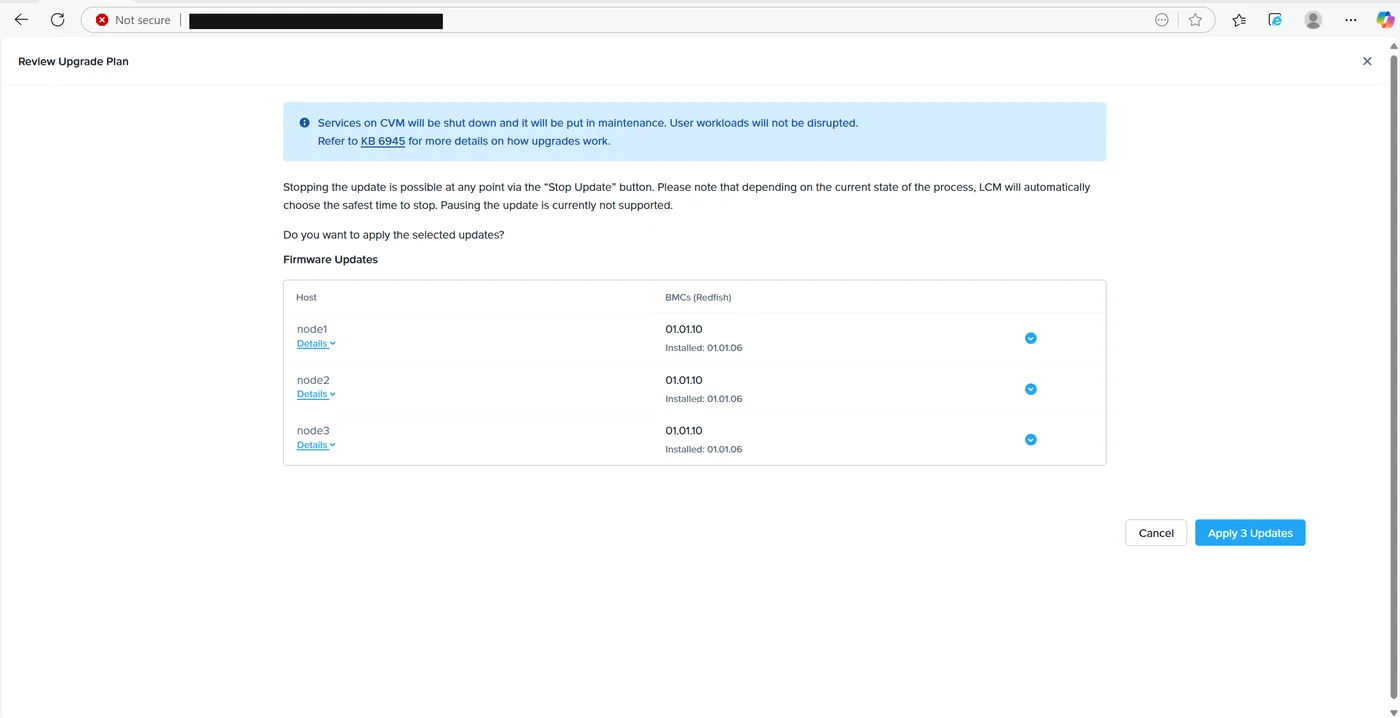
The BMC plan puts each CVM into maintenance mode and shuts its services down in turn; workloads aren’t disrupted.
Then the HBAs. This is the heaviest operation in the whole sequence, and the plan review says so: each node boots into a separate update utility, one node at a time, may reboot multiple times, and disk checks run before and after. Workloads migrate automatically — but read the line about making sure the cluster has enough compute and storage to run with one node offline. On a three-node cluster that’s the entire safety margin.
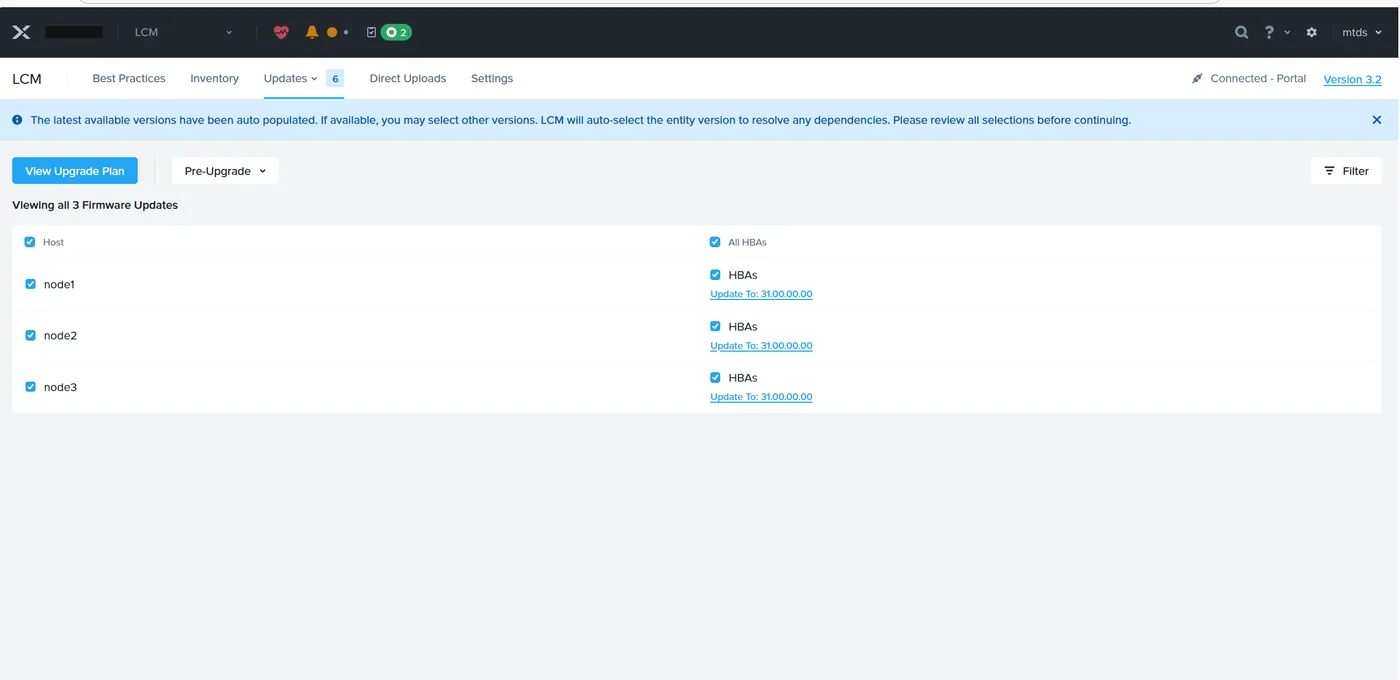
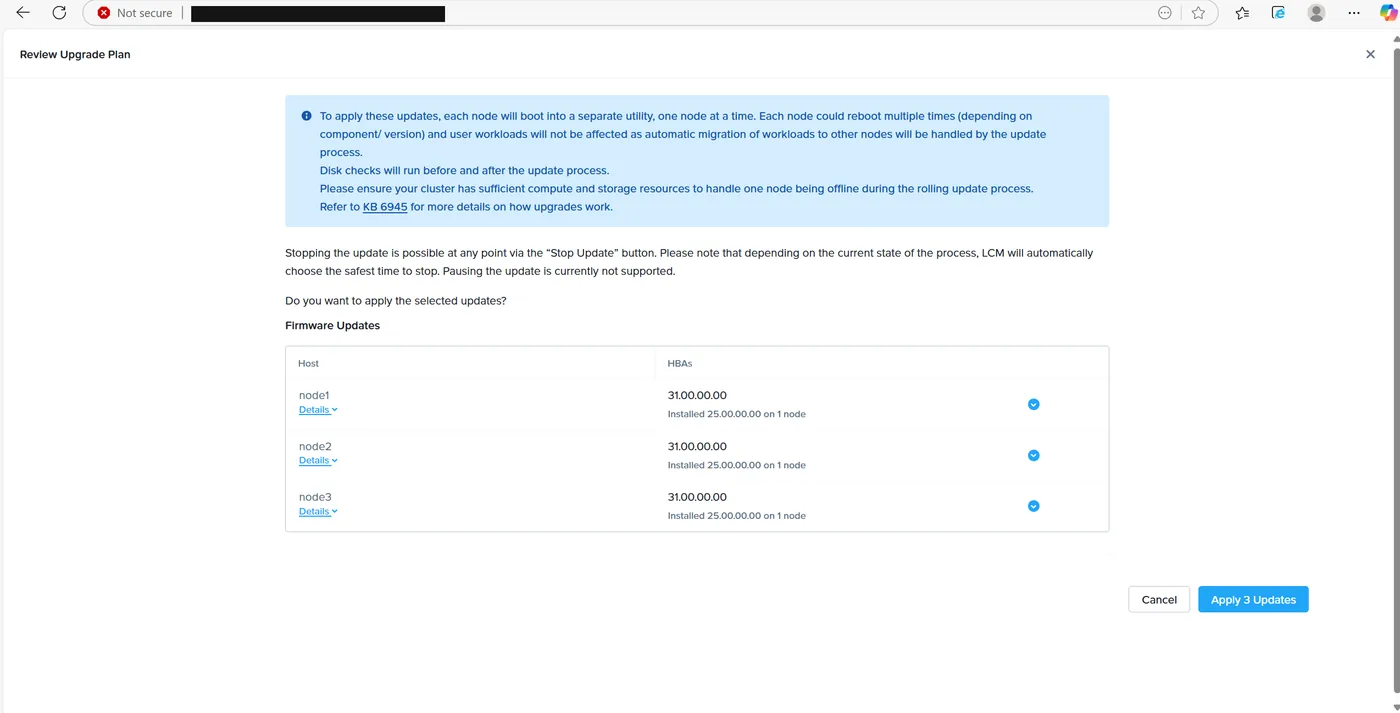
Budget real time for this stage. Where the software updates each took minutes, the firmware pass on this cluster ran for well over an hour end to end, because every node has to be evacuated, rebooted into the utility, updated, checked and brought back before the next one starts.
Step 7 — AHV
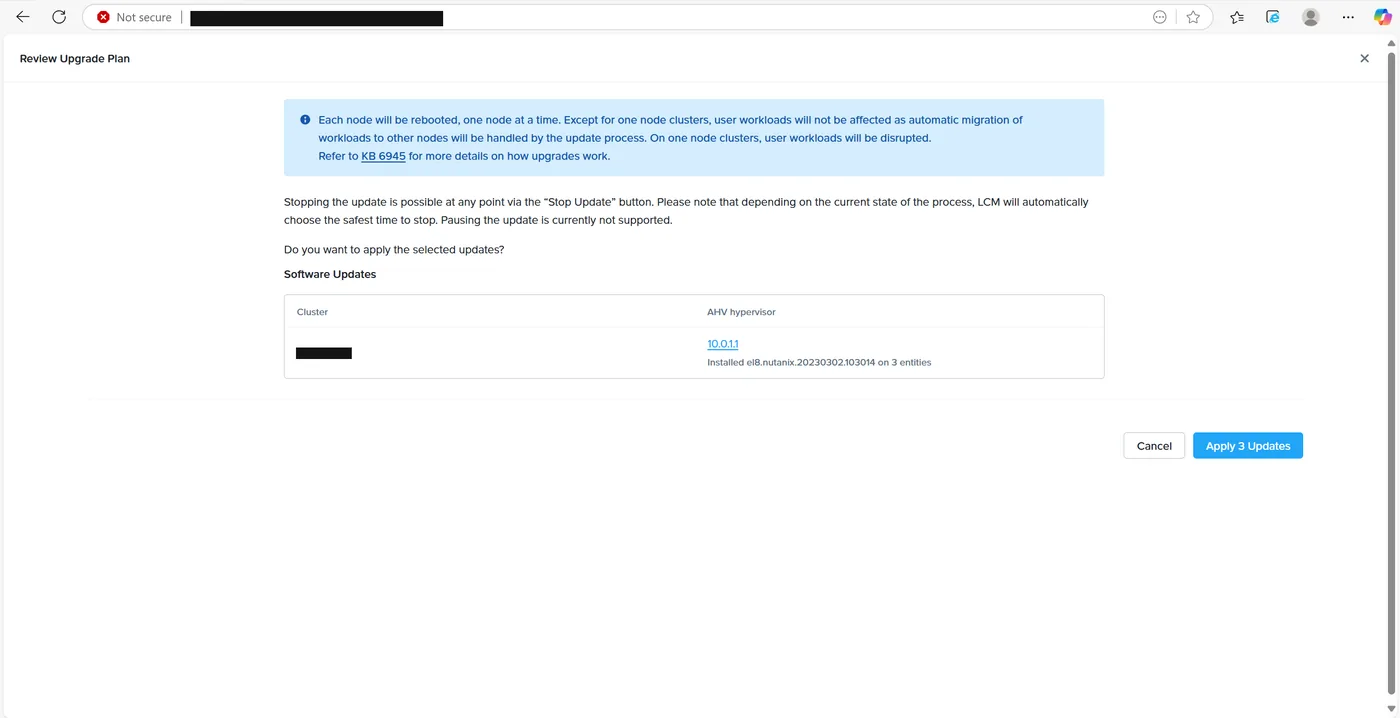
Last, the hypervisor. With everything underneath it current, AHV 10.0.1.1 is offered for all three hosts.
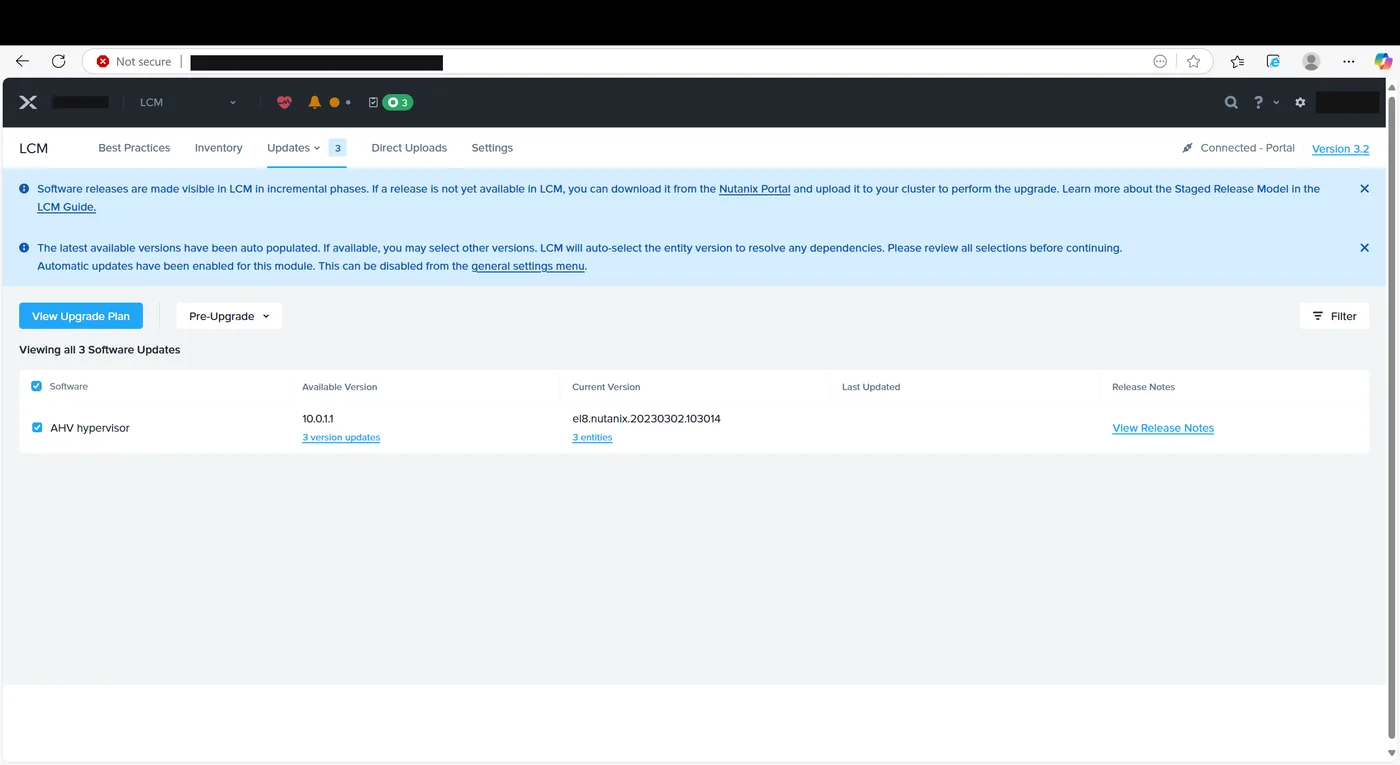
The AHV plan is another rolling host reboot with automatic workload migration — with one important exception called out in the dialog: on a single-node cluster, workloads will be disrupted, because there’s nowhere for them to go. On three or more nodes, users shouldn’t notice beyond the latency mentioned earlier.
Afterwards
Once the last update finishes, run a fresh inventory to confirm the Updates tab is clear and nothing new has appeared, re-enable the email alerts you silenced, and run a full NCC health check. If the cluster uses a Witness VM, upgrade that too — its version is independent of AOS and PC and can be done at any point.
The whole sequence on a three-node cluster is comfortably a half-day maintenance window, dominated by the firmware stage. It’s also almost entirely hands-off once you’ve reviewed each plan — which is exactly why the reviewing is the part worth doing carefully.
If you’d like help sequencing an upgrade across several clusters, or have a Prism Central and Prism Element combination you’re not sure about, get in touch.